Saturday, June 29, 2013

Lantern Quilt Top: June Finish

Yay! My Good Fortune (by Kate Spain) lantern top is done, just in the nick of time to post my June finish and enter the Kate Spain blog hop. Phew. It's so peaceful and calming... I'm so happy with it!


I've designed 5 lantern blocks using jelly roll strips (if you're interested in your own quilt, see the bottom of this post!). Ever since I bought this jelly roll last summer(?), I wanted to make a lantern quilt. I searched Pinterest and blogs for ideas, but only really found this quilt (2nd on the page) from one of the 2011 Quilt Markets. Then, I decided to just try it all on my own. I set out to make a quilt solely with the jelly roll strips and background fabric. I'll be sharing more of the color theorizing/strategizing (which apparently isn't a word - good to know!) with this quilt soon.


 The blocks come together really easily. I wanted them to look like they were floating (I LOVE Tangled) (just click the link and watch the clip already! It's worth it!), so I placed them at different heights. Being the Kate Spain fabric-a-holic I am, I just couldn't let those extra jelly roll strips go to waste, so I decided to add them randomly as another modern element to the quilt. It makes it very assymetrical, and I love that. The other extra strips will go towards one more lantern on the back, and the binding.


Today Mike helped me take pictures in front of my mom's Gingko tree, which I thought was the perfect background. Actually, it was my second choice - we tried to go to a small park I love in a nearby town that has a pond and a bridge (:D) but we literally could not find it. It's sad to think that maybe the park has been built over  in the last couple of years? :(


And here's Mike showing me how cool the Kona Purple looks on the "color accent" camera mode. I am SO GLAD I didn't just go with my typical gray or white this time. I feel like the Kona Purple totally makes the quilt!:


I'm starting a Lantern-A-Long in July... stay tuned for more info this week! :D There will be prizes to win (as a little incentive!). Start thinking about what jelly roll/fabric-you'll-cut-into-2.5"-strips you want to use (and your background fabric! So important!).


 -------------------------------------------------------------------------------------------
Linking up to:
 A Lovely Year of Finishes
Kate Spain Blog Hop

Friday, June 28, 2013

Summery Fabric Wrapped Wreath - Makin'

Just a quick post today! I'm heading across the state to see a girlfriend (I make it sound like NJ is super wide, which it is not, lol), and I'm battling right now between going to the gym and finishing a quilt top... What do YOU think is going to win out? I honestly have no clue right now, lol.

I made this summer wreath for another coworker the night before the last day of school this week. I wanted to give her something special since she was my very helpful and supportive in-class support teacher! You can see the other wreath I made for spring right here. I used the same process as before and it literally takes 45 minutes to do (or less, if you're okay with the glue gun burns)! The hardest part was choosing the fabrics I wanted ;)


 I was going for sun to beach to ocean-y. I'm now obsessed and need to make one for myself (to replace the spring one that's still hanging on my door - come on, Jess!). Hopefully next week. I bought the hard wreath forms this time (flat, stronger than cardboard - as opposed to green styrofoam, which I cut into two) and I'm not sure how much I like them - they are smaller. Only time will tell.

I'll be back Saturday or Sunday with my finished Good Fortune quilt top to link up to the Kate Spain blog hop! :D


Tuesday, June 25, 2013

"Summer Fun" - A Finished Baby Quilt

It feels so good to have a finish this week. SO good. The last couple weeks of school completely tired me out (after the last day yesterday, I napped for most of the afternoon, even though I really just wanted to sew!). Anyway, I made this baby quilt quickly within the last week as a gift to a co-worker, who is having her baby very soon!  

Fun fact: This quilt was named by one of my 6th grade (now 7th grade... tear) students who is really into quilting (she's always asking me to teach her! <3).


 I wanted to thank my friend for all of her kindness and help this year, it being my first working in the school. She's also totally crafty, so I knew making her a quilt was the way to go. She seemed very touched when she opened it (isn't it the best feeling when you know someone appreciates all the hard work you put into a quilt?). The second best part: I included the cute Riley Blake bike fabric without knowing that she loves biking and that her fiance is actually bike mechanic. Was that meant to be or what? I can't make this stuff up, people!


"Summer Fun"

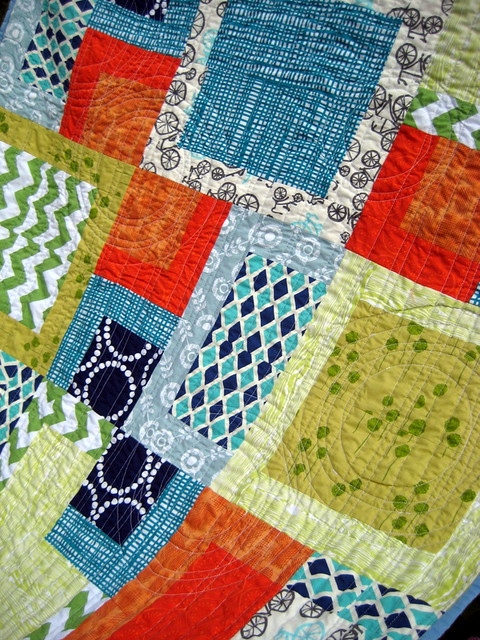
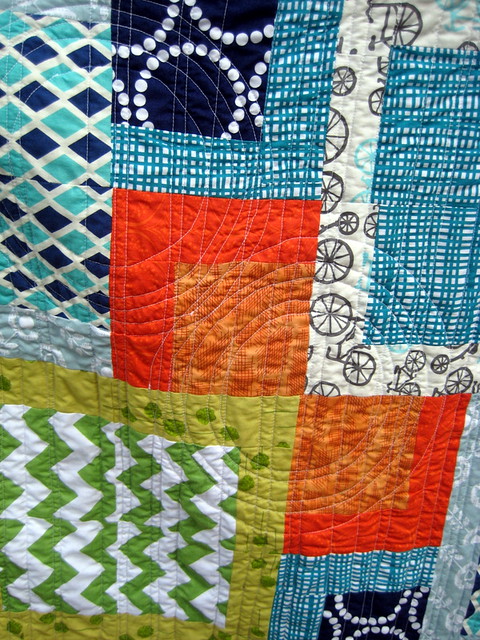
I had originally gathered that she liked neutrals, but she also liked orange and blue. She doesn't know the baby's gender yet and wants to be surprised (in addition, she shares my sentiment about not throwing blue at boys/pink at girls). In came the fun combo of orange, blue, green, and lots of white to balance it out. I used Color Scheme Designer 3 to come up with this triadic color combo (go spin the color wheel over there, you won't be sorry!).

"Summer Fun"

Quilting this one was an absolute joy. I tried my hand (machine?) once more at repeating and overlapping circles (I also posted a tutorial here if you are interested). To vary things up a bit from Fruit Punch, I also quilted "organic" (aka not exactly straight or measured out at all) vertical lines over the circles and all the way across the whole quilt. I felt like this gave the quilt the texture it needed, and the extra visual interest. Also, still in love with effect of circle quilting on squares!

"Summer Fun"

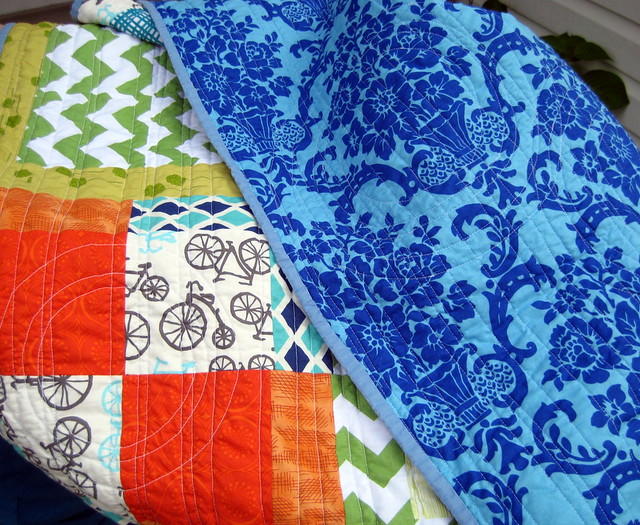
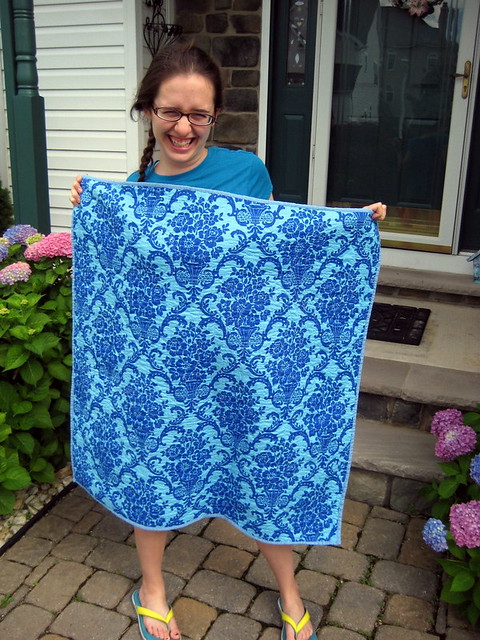
The pattern is the Stacked Squares by Erica of Kitchen Table Quilting, which was recently posted on Moda Bake Shop. I just couldn't get it out of my head! The backing is a pretty Jennifer Paganelli fabric, which I thought was a perfect match to the front (though a bit more traditional), and the binding is a light blue solid from my stash. I thought the quilt was busy enough to justify a completely solid binding. Also, this was an ENTIRELY stash-made quilt! (I expect applause!!).

"Summer Fun"
Ris said she couldn't believe I actually made a backing with just one piece of fabric! She says she doesn't like pieced backs. Noted. :) (though, I love them, I'll keep it in mind for her!)

"Summer Fun"

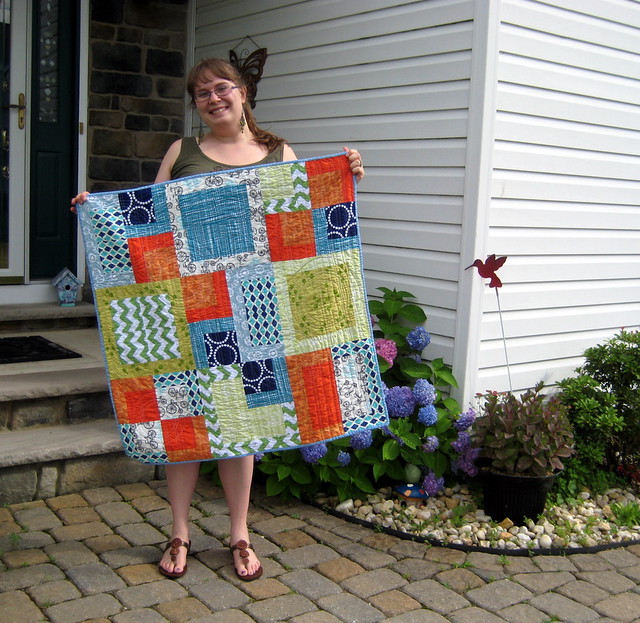
Can you tell that Ris (my sis) and I had fun with our photoshoot? These was taken on the fly because I had to get it wrapped and ready - otherwise we might have gone to a more glamorous location than the front porch. However, I love my mom's hydrangeas, so it actually worked out quite well :) Plus, I got to show off my cute new flip flops :) (that are unfortunately now returned because they hurt my feet so much! :( ). Why can't shoes be cute and functional, like quilts?

A few more outtakes... lol. A flickr mosaic always works best here. Just keepin' it real.


Linking up to: Fabric Tuesday, Sew Cute Tuesday, Needle and Thread Thursday (a new link up at My Quilt Infatuation!), TGIFF, Finish It Up Friday

P.S. Thanks for all of your comments on my last post. I really, really enjoyed reading them!


Sunday, June 23, 2013

"What would I do in my life without quilting?"

My friend Lee, a fellow guild member, recently asked me this question in an exchange of emails.  I wanted to comment on it, and I asked if she would allow me to use her story in my post. She was explaining why she couldn't attend our inaugural retreat; she was in New Mexico with two other quilting friends from IL and MI!:

"We sat in the courtyard and sewed all afternoon in the sun--that's where I finished most of the baby quilt I just showed at the guild. Then we would go out to dinner and after dark we sat around the dining room table and did our best with the feeble overhead light.  One advantage of hand-sewing--we didn't have to drag machines out west!

What would I do with my life without quilting?"

That statement sat with me. What WOULD I do in my life without quilting? Read more? Write more? Watch more TV? Exercise more? Do more dishes (lol)?... Throughout middle and high school, I looked for my crafty outlet. I was addicted to scrapbooking for a while - something my mom and I did together all the time. But then it became somewhat cumbersome (Example A: I have two whole scrapbooks that are sitting waiting to be started - all the pictures are even ready!). Now, sewing, fabric collecting, blogging, and quilting are EVERYTHING to me.

Every week day, this is how my day goes:
6:30am - get up and get ready for work
7:15 - eat breakfast and drink coffee at the computer, where I catch up on quilting blogs
7:40am - about 5pm - teach, plan, grade, and in between, think about latest quilt
While driving anywhere - think about  FMQing (something about driving a car reminds me of driving a sewing machine)
5pm-12am - take at least a half hour to sew. Rest of time: go to gym, make dinner with husband, grade, plan, and reading more blogs/type blog posts

Weekends:
Whenever I don't have much planned, besides the inevitable schoolwork, I sew. And it is FABULOUS.


(Check out my brand new design wall as of yesterday more soon!)

I've made so many friends just in the past three years through quilting. Of course, many of them are YOU, who I have swapped with, and chatted with online just because we love it all :) At first, I was SOnervous about going to the interest meeting for the Central Jersey Modern Quilt Guild in December 2011, because I didn't think there would be anyone near my age there. I was a senior in college at the time. That was naive because I learned that age doesn't matter when it comes to an art form. Now, I'm the webmaster and VP, and it is so fun to see my friends every month, in person, to talk about quilting and sew with!


I've made all kinds of things for my friends, family, and apartment. I've even shared my quilts with local first graders. I've sold t-shirt quilts and lanyards to people all over the country, and this blog has been a vehicle for my creative outlet.


It makes me happy beyond belief to know that I'll have quilting for the rest of my life. That is, until my new Janome takes its last breath. I'll probably cry a river. Then, I'll have to go buy another machine... but that day is very far away indeed. ;) Either way... I finally feel at home with my creative outlet.

I just wanted to share my thoughts about this. Thanks, Lee, for sharing your thoughts. What would YOU do in your life without quilting?

Linking up to: Let's Get Acquainted


Friday, June 21, 2013

Overlapping Circles Machine Quilting Tutorial


Today I'm going to share how I quilt circles! I'm sure there are other ways to do this, but this is just how I've done it. I hope this is helpful!


Ready?


Materials
  • Sewing machine (duh)
  • Washable marking pen/marker (I use a blue Mark-B-Gone and have never had a problem!)
  • A bowl (mine has a diameter of 5.5" - you could go smaller if you like - and also, make sure your marking pen is washable on whatever bowl you use!)
  •  WALKING (or even feed) FOOT for your machine. This is essential!
  • Small scissors (or big scissors if you can't find your little ones, like me)
  • Your quilt! 
 Directions

1. Lay your already basted quilt sandwich out, face up. I've found that spray baste works best with this kind of quilting because you don't have to skirt around pins.

2. With the marking pen, trace one circle somewhere on the top, using the bowl. I like to use the quilt as a guide - at intersections, etc. (see below).


3. Go to your machine. Bring your bobbin thread up through the quilt top (I didn't know how to successfully do this until very recently - it prevents bird's nests on the back of the quilt).


4. Set your stitch length to medium. On my Janome, I like 2.5 - not too big, not too small.

5. You can do the next part a couple of ways - I start stitching a couple inches, then a couple of back stitches to secure. If you don't like back stitching on quilts, you'll leave those threads to bury for later. Be careful they are not too long, though, or they might get in your way. Anyway, after I backstitch, I cut the threads short so that I can continue.


6. Slowly guide your fabric through, following your circle guide. You WILL have to stop and turn the fabric several times to make it follow the curves successfully. This step is extremely helpful if you have a knee lift on your machine - everything is faster and there are less mistakes (for me, at least!). No matter what, you will constantly have to reposition the quilt with BOTH hands. It will be frustrating at first, but never fear - over time, you will gain a bit of speed.


7. Once you get towards the end of your circle, stitch to your start point, back stitch a couple stitches, and then stitch over those again (again, only if you choose the backstitch method). Snip your threads, plus the original threads once again (so you can't see them at all), and you are finished with your first circle!


 Here's what it looks like from the back.

8. Now, if you want to do repeating circles like I have, you have to keep going! Plus, I'm pretty sure you're not going to leave that little circle so lonely ;) So, this part is all up to you. Sometimes I use my walking foot as a guide to make a second circle around it - instead of finding another template to trace another. I eyeball it and if you go slow enough, it shouldn't be too hard. Sometimes I also extend a half an inch, or a whole inch, past the circle I just stitched, eyeball it, and stitch another circle. I'm a daredevil, lol. I do the same thing as before: bring up the thread from the bottom, stitch, backstitch, and just follow my first circle as a guide.


9. Now, if you want to make overlapping circles, simply trace another circle template somewhere else close on your quilt top. Repeat the same process as above.


10. When you get to this point, just make sure you keep looking where you are stitching (at the circle you previously sewed on the same circle you're tracing!) or you'll get confused with your very first repeating circles!


And there you have it! Overlapping machine quilted circles. See, I knew you could do it! :) Please let me know if you have questions or if this tutorial works for you!

Be back soon with lots of updates. Jeez, I haven't had a finish in a while, though that is soon to change!


Tuesday, June 18, 2013

WIP Wednesday


Baby quilt... needs to be done before Friday... ready, set, go! I just couldn't get the Stacked Squares tutorial at Moda Bake Shop out of my head, and tried a baby version of it!


More soon, as well as a tutorial for quilting overlapping circles (already mostly written, just need to edit the pictures!). In the homestretch for grading and school! Now, off to quilt :)

Linking up to:
 GRAB A BUTTON 


LinkWithin

Related Posts Plugin for WordPress, Blogger...