
Pinterest Inspiration Board - in case you need some inspiration. I will keep adding to it throughout the QAL!

Please share this button on your blog if you are participating!
Thank you so much to the wonderful QAL prize sponsors!


The only rules are:
- Orange peels of any kind must be a main design element of your project.
- This will be taken into account during judging.
- You may link up one entry per category (via blog or Flickr). Please include dimensions when you post!
- The three categories are quilt, "just the top," and mini - see the official page for details.
- Your project(s) must be made in 2014.
- Have fun!
Share your photos and thoughts!
- #orangepeelqal on Instagram - share your design, progress, and finish photos - this feed is so fun to scroll through!
- Flickr Group - share your design, progress, and finish photos. Also, chat with other participants - conversations are developing in the "discussions" bar about which method you are using and what your design ideas are!
------------------------------------------------------------------------------------------------------------------
Hi there, Orange Peel-alongers! Thanks for letting me stop by and share some applique stitches with you today. A few months ago, Jess and I met up to trade our Sisterhood of the Traveling Quilt tops, and spent a few hours talking fabric (duh!). We also spent a lot of time talking Orange Peels because she and I are collaborating on a border of them on my quilt top, and she was in the beginning stages of planning the QAL. While eating cheesecake, I also suggested that I'd love to do a guest post if she needed one. I don't know if she so much as needed one, but she allowed me to butt in and talk about applique stitches. I'm excited to share a few ideas today, because to be honest, this step, the applique stitches, were what kept me away from appliqued quilts for so long. Not anymore!
First things first, once you've gotten to this stage you've already decided how to put your orange peel on your background fabric: stitch and flip, just interfacing, raw-edge, etc. So keep that in mind when choosing an applique stitch. If it's raw edge, it will need more support, but if the edge is reinforced you can have more fun. Of course, I am making a pillow for my sampler, so I didn't mind not reinforcing my edges. I like the live on the edge. (No pun intended...)
If you want to give hand-appliqued stitches a try go grab some embroidery tread, a needle, and this tutorial, and get to stitching. Your stitches will look something like these two projects. I can thank my mother for these two photos, because she taught me the blanket stitch on the butterflies and she made the adorable pillow.


But, here's where I get real with you. Hand applique is fun. I like it, I really do. But I also like instant gratification, so for my sampler today I'm bringing out the big guns and doing only machine applique. Call me lazy, if you want to, but you might thank me later when you have time to make it to the gym... like I'm trying to today.
Step One: start by pulling your bobbin thread UP so you don't get a nasty bird's next on the back of your quilt. (Or be a rebel, and enjoy that bird's nest. I rock it in my hair everyday, so more power to ya!)

And, make sure you don't start on the point of your orange peel. Whew. That bunches up quickly.

I started and ended all of mine with a lock stitch about an inch away from the point of each peel. It worked out really well.
Now that you've pulled your bobbin thread up, and locked your stitch in place, let's get started. When it comes to applique stitches, I think the best rule of thumb is: test it out.
No, really. I don't think you heard me. Test it out. Or you'll be like me and ripping stitches out, and nobody has time for that.
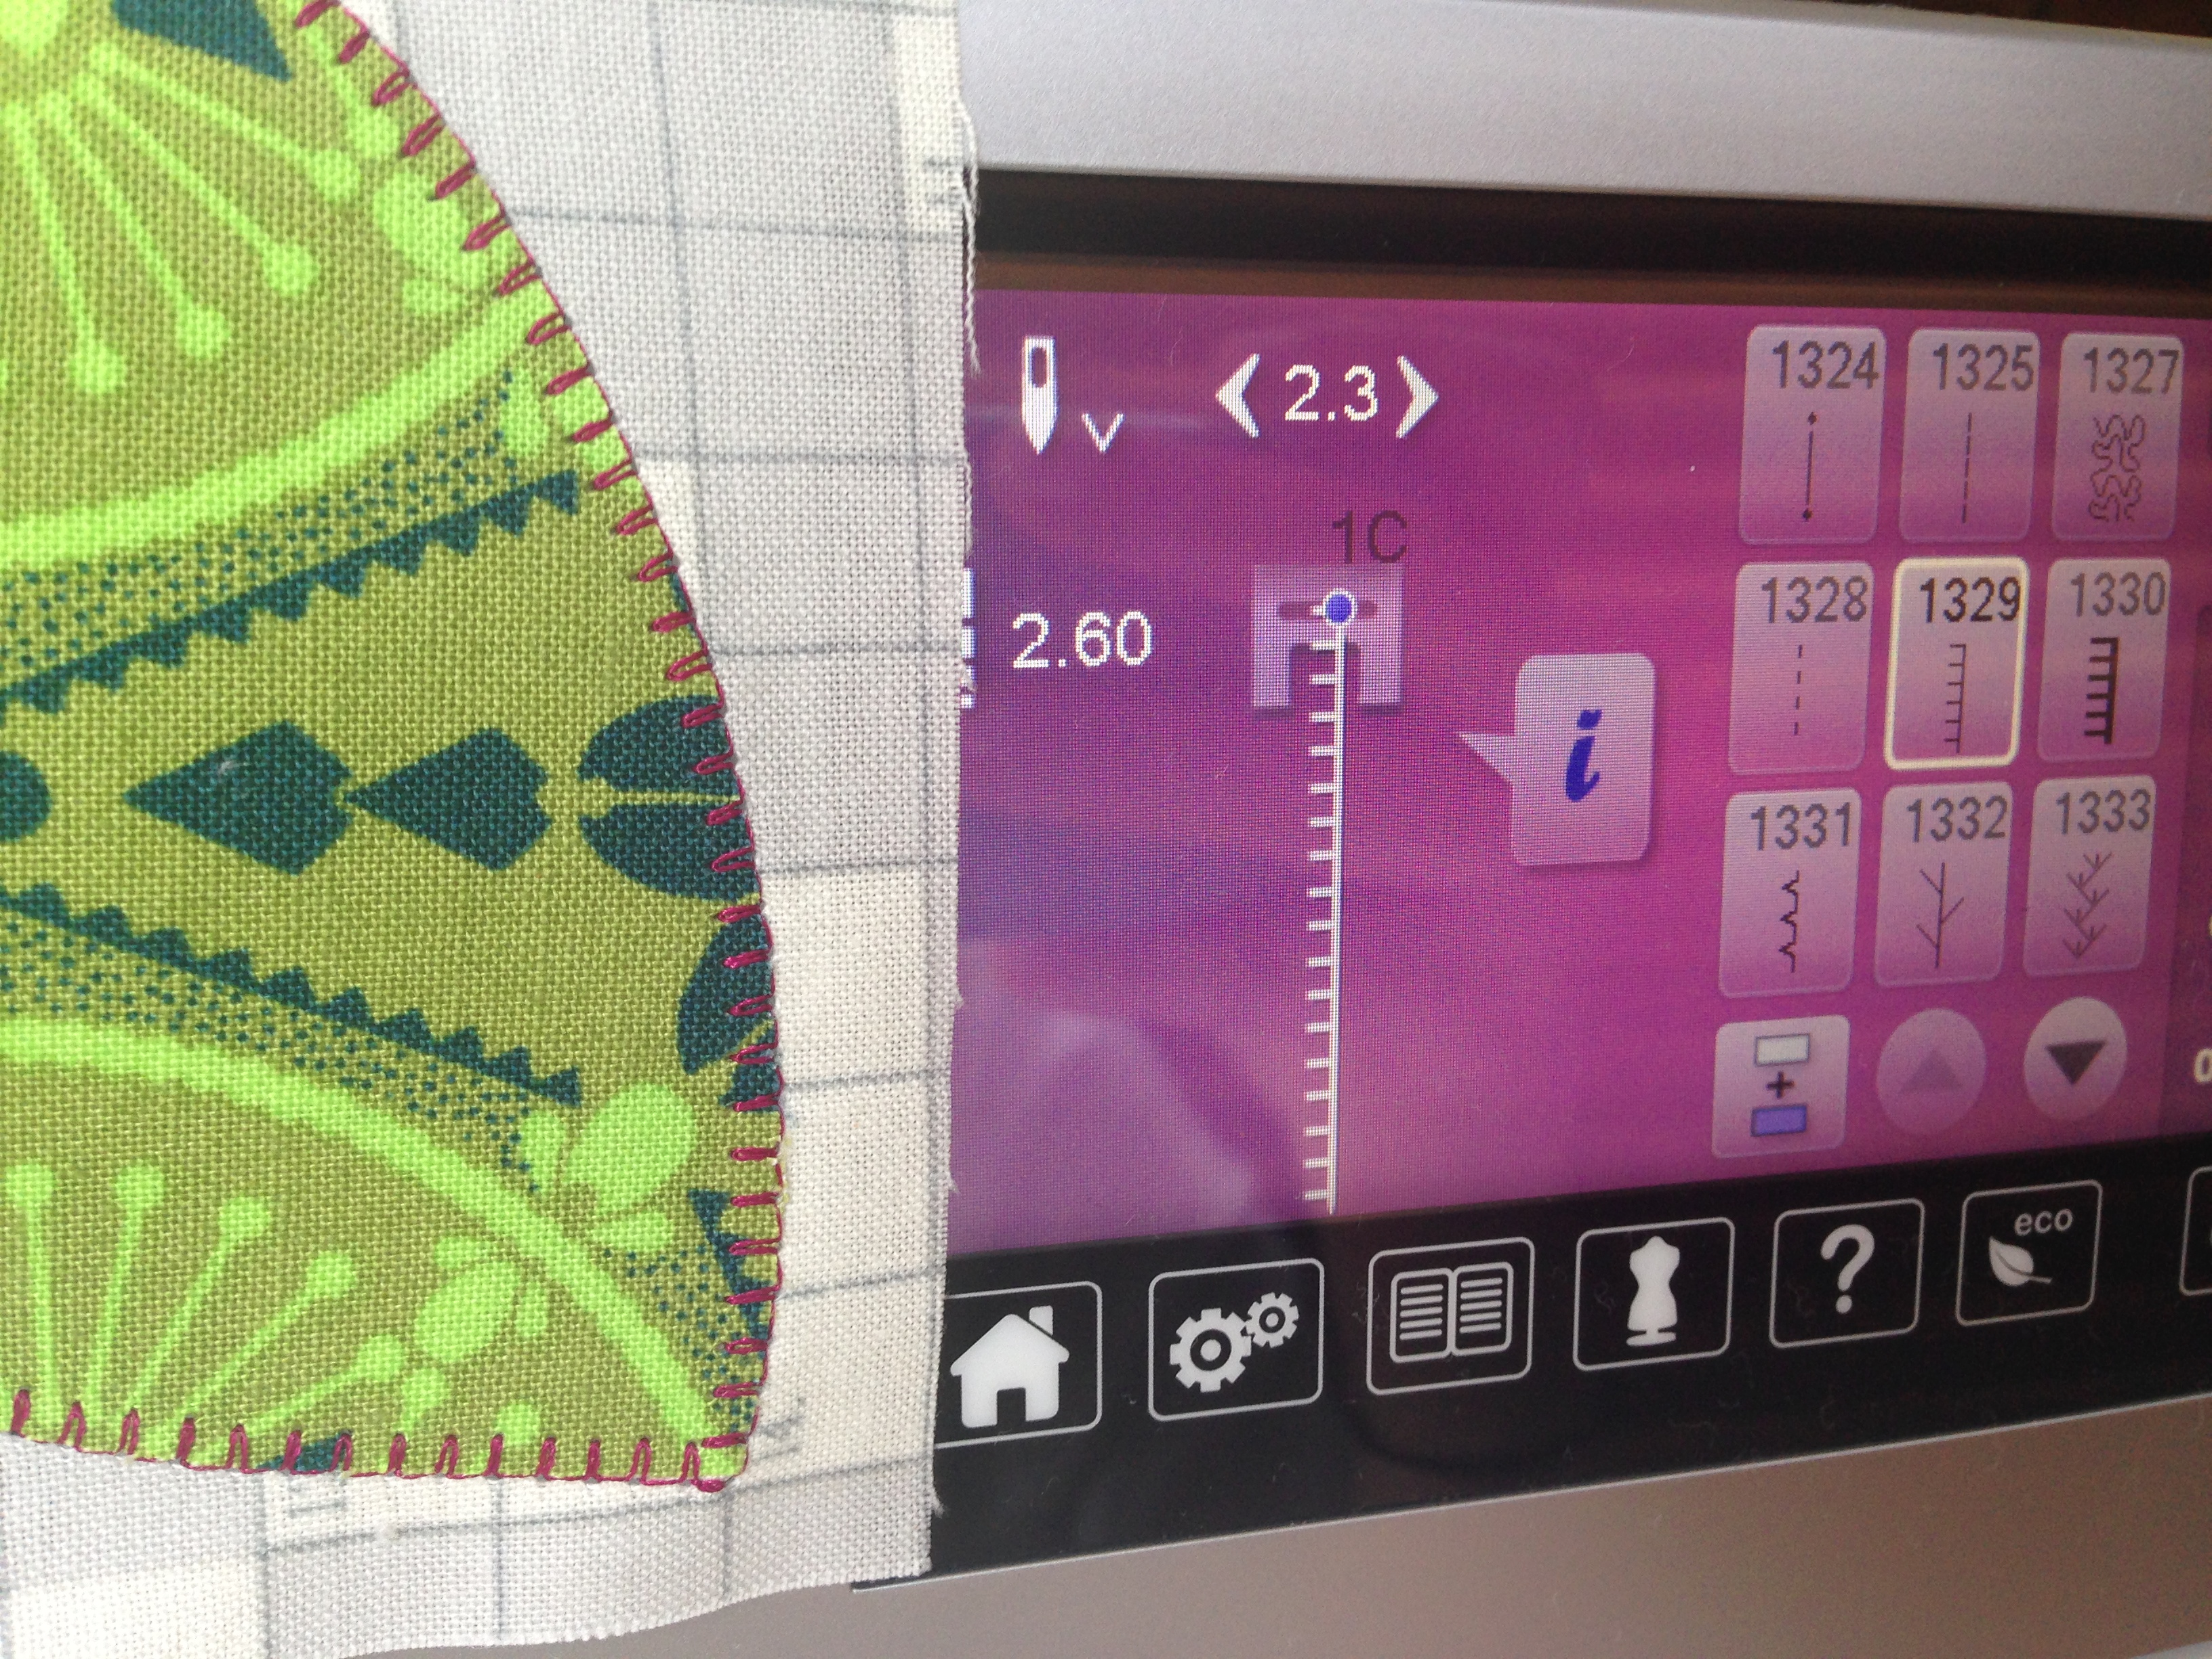
Get out a piece of white scrap fabric (I would suggest a 10x10 inch piece... so that's really not a scrap, but whatever) and start testing. Use a fine tip Sharpie marker to mark the widths and lengths you used as you test each stitch and be sure to write down your stitch number for your machine. That way, you can get a feel for the stitch before putting it on your design. For the purposes of today, I just took photos of the stitches next to my sewing machine's computer screen, but I'm also going to use this project as an applique stitch calling card. Multi-tasking here, folks.
The other purpose of testing out your stitches is that you can get a feel of where and how the needle swings. You’ll want most of whichever stitch you choose to be on the orange peel itself. That means that the RIGHT swing of your needle should JUST punch your background fabric, and the LEFT swing of your needle should go into your orange peel. Look closely at these two photos -
The right swing is going into my background fabric, but it's riiiiiight on the edge.

The left swing of my needle goes into the applique shape, locking it down.

Now that you've got those basic rules down, let's move onto the stitches.
Here's what I started with:

A rainbow of AMH orange peels, each begging for their own applique treatment. I feel ya, girls.
I've already used the blanket stitch and a zig-zag on plenty of projects, so today I want to encourage you to test some new stitches. Really, why else do we have hundreds of stitches on our machines if we don't let them party every once in a while. So, grab a cup of coffee, or some wine, and I hope you find some inspiration from the stitches I played with today! For stitch details, be sure to reference the computer screen next to each stitch!
(Warning: All photos ahead... since let's be honest, it's been pretty wordy up to this point!)


(Oh, that corner haunts me. That's why you slow down, adjust your stitch length, and make it work, people.)

So, here's where I get honest with you. I loved this stitch. But, at first it puckered and tunnnnnneled.

But, fear not! I ripped it out, so you don't have to. Two Words: Use.Stabilizer. For your projects you can use Pellon Stitch and Tear which comes off easily and keeps all of your shapes from distorted with the stitches. Don't call the quilt police, but I made do with some interfacing because I'm an hour away from a craft store. Don't judge, ya'll. It worked.
(The straight stitch is so underappreciated!)


Another one that puckered.... (*&%$#!!!!!!)

(Yes, I did break out the thick blanket stitch and call it new.)
So, here's where I leave you to go try new stitches. What, you thought you'd get to see them all? I have to save some suspense for the finished reveal of the QAL. I can't share all my secrets.
However, I hope you're inspired to use more than the zig-zag and the blanket stitch, or at least make them larger than you normally would feel comfortable with on your applique projects. This step takes long enough to show up in my humble opinion.
What about you, what machine stitch do you like to try? After all, I have 5 more petals to stitch down. What should I try?
Thanks again Ashley, for such an inspirational and well-thought-out post! And please make sure to stop by next week and link up your progress photos. We're halfway through, folks!
Schedule:
YOU ARE HERE --> July 21: Applique stitches with Ashley @ Wasn't Quilt in a Day
July 28 - August 4: Mid-way check in linky party
August 11: Other quilting ideas for orange peels
August 23 - September 8: Final Link-up!
September 9 -September 16: Voting for Viewer's Choice prize
September 9 -September 16: Voting for Viewer's Choice prize


Yay for another awesome NJ quilter! I am planning on playing with some stitches when I go to quilt mine.
ReplyDeleteMy favorite is the thick buttonhole, as you call it on your machine, but mine makes it a double stitch and I love the look. Do you have the little string of hearts? That makes a pretty edge, too.
ReplyDeleteI'm thinking this should have been call the AMH Orange-Peel-Along, haha, everyone's busting out AMH! Not me, I'm a rebel. Ashley, I love the different stitches you tried out! I'm planning on a sketchy stitch with my FMQ foot to sew my petals down, but my machine does have several decorative stitches that like to party...We'll see what the fabric tells me to do ;-)
ReplyDeleteGreat post, thanks!
ReplyDeleteIt was very useful for me. Keep sharing such ideas in the future as well.mundocosturas
ReplyDelete