Sunday, October 30, 2011

Favorite Things (Friday?) #7: Halloween Costumes, and My Memories Winner

First, thank you for all the feedback on my post about acceptability in the quilting/blogging world. I just needed to say some of those things out loud, and it's very nice to know I'm not the only one who feels like that :)
-------------
Oops. I forgot to post on Friday. So, here's my favorites for the week!
Pinterest is full of cute costumes
(WARNING: many of these will be cute babies. I have no shame):
(click on picture for Pinterest source)

Pinned Image

Pinned Image

Pinned Image

Pinned Image

Pinned Image

Pinned Image

Pinned Image
Pinned Image

Tee-hee, so cute! I don't have a costume for tomorrow - in fact, I'll be in class during trick-or-treating -_- sigh. Do you have a costume?

---------------------------------------------
The My Memories winner is....

Congrats! I'm emailing you! Thanks to everyone who entered, and a BIG thank you to My Memories for sponsoring this giveaway!


Friday, October 28, 2011

Blogger's Quilt Festival!

I'm linking up to the Blogger's Quilt Festival today. I had so much fun last year (when I was just starting to quilt and blog), and I decided to join up again.

IMG_5259

For those of you visiting for the first time, let me say I'm pleased to make your acquaintance :) I'm Jess, I've been sewing and quilting for a year and a half, and I am a college student who is always thinking about her next craft rather than her homework (though, if I may say so myself, I'm still doing very well in school and will graduate with honors in May ;)). I also just started an etsy shop called Purple Strawberry Handmade - check it out for fabric lanyards (and key fobs soon), which make awesome stocking stuffers!

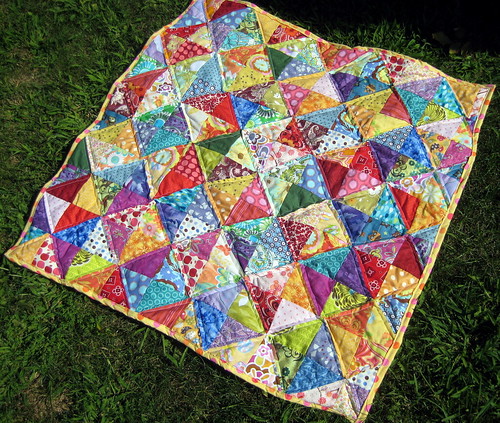
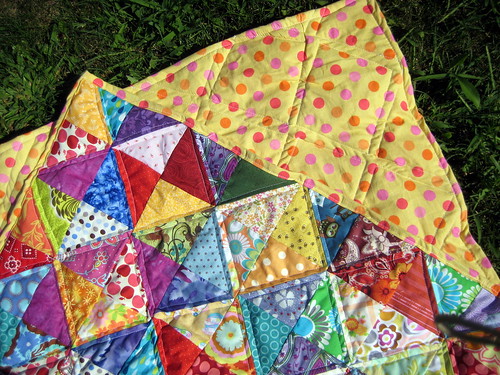
My "Lucky Charms" quilt is near and dear to my heart. I started the quilt to challenge myself. Over at In Color Order, there was a Warm/Cool (color) Quilt Along, following a half-square triangle (HST) pattern. I had never really thought about color theory before when making quilts, and I had never made a HST - perfect.

IMG_5260

I was bogged down by other sewing commitments until after the QAL was over, but I did it anyway (sometimes I feel it's nice to see the tips of others afterwards and then try my own, too!). I had a blast going through what scraps I had, and deciding what would make the cut.

I chose mostly bright colors - from every color of the rainbow - hence the eventual name "Lucky Charms," like the cereal (a name that luckily [excuse the repeat of words] just came to me). I also tried to pick out cute prints that a child would like.

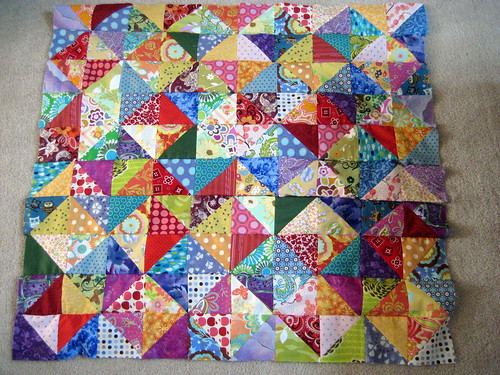
Warm/Cool QAL Baby Quilt - Quilt Top
(I messed up sewing one of the rows, so I took it out - if you look closely, it's the 5th from the bottom. The final layout ended up being completely different!)

Plus, I was super excited to finish the quilt top, because let me tell you, it took a long time. I really admire those quilters who made lap size or full size quilts - this was only a baby quilt.

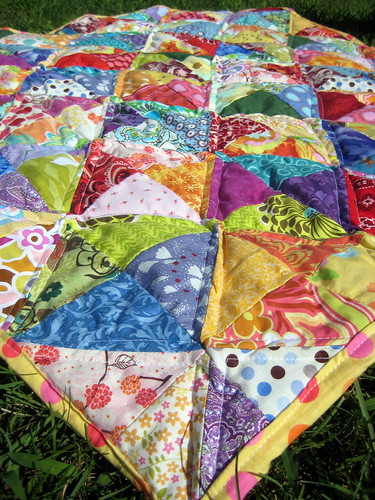
I learned that I can handle a quilt with HSTs. I learned that, if I trust my color sense but still go with the scrappy look, everything will turn out okay. I also folded over the binding from the backing for an easy binding - which I then sewed down by machine. This was my first time trying that technique.

Somewhere along in this process, I heard about the quilt drive 100 Quilts for Kids. I decided that I loved this quilt so much that I was going to give it away. I donated to Quilts for Kids - I like to think that a little girl or boy has received my quilt and hopefully has found comfort in it.

IMG_5261

Go over to the Blogger's Quilt Festival to see all the other beautiful quilts! Thanks for stopping by and if you like what you see, I hope you'll stick around! :)

Amy'sCreativeSide


Thursday, October 27, 2011

You CAN! - Acceptability in the Quilting/Blogging World


Over the last few months, I've been getting emails and comments from people who are just getting into quilting and/or blogging, who want to know whether something is acceptable.

(this post will be interspersed with fall pictures from my campus to ease your eyes from the text :) And because I love fall. Reason enough, right?)

As someone who is also still fairly new to all this (1 1/2 years of sewing, 1 year of quilt blogging), and as someone who is completely self-taught, I just want to set the record straight.

Don't feel like the quilt police are on your tail. There is no "right" way to do something - which is one of the reasons I feel so comfortable with the modern quilting trend. There ARE no rules. This goes for people who want to make traditional quilts as well, though - do what YOU want to do. Don't let anyone make you think that your creativity should be compromised for something "right." Take risks. Enjoy your craft!

-----I want to start a list here - a positive atmosphere for people to share encouragement and crafty ideas - different ways of doing things.-----

The first thing I encourage quilters new and old to try is cutting your backing 3 inches bigger (just in case you are off by a little) and fold it over to make the binding. You don't HAVE to make a separate binding! It saves you loads of time, and then you just machine sew the binding to the top of the quilt. If you'd like to see a quilt I made with this technique, see this post. The finish doesn't look any different!

The second thing is that it is okay to buy fabric and supplies from places like Walmart, Hobby Lobby, etc. I have, especially because I'm on a budget. Depending on the fabric, it might not be the best quality, so for things like solids I would go for good quality Kona or Bella if you can afford it. However, you don't need to have the latest fabric line to be accepted. :)

Finally, with blogging - you don't need to have thousands of followers to be a good blogger. You also don't have to have sponsors. You don't have to do product reviews (I just tried this for the first time to see what it was like). You don't have to do giveaways. Blog for you and enjoy every second. For the people who do have lots of followers and/or sponsors, rock on. I enjoy reading your blogs, too. :)


I haven't been asked about this last one but it's something I just wanted to say.

Anyone else have suggestions? Again, please keep this a positive atmosphere and please share this on your blog or with other quilters if you can. I would love to get your feedback. Thanks in advance!

If it helps, start by saying, "You can...."

And thanks for being a great online community.


Tuesday, October 25, 2011

Fabric Baby Book - A Mini Tutorial


*Updated: 4/8/2013

I had a few requests for a mini tutorial, so here we go! It's an awesome, scrap-busting project - I hope you'll try it out!

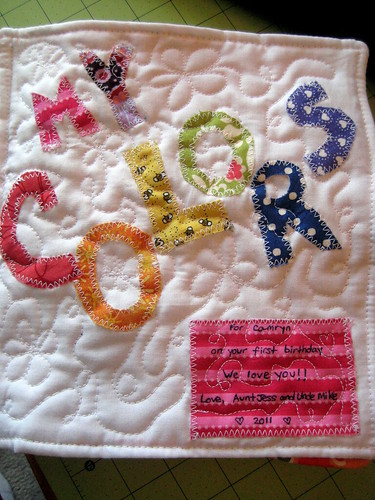
Front cover of fabric baby book

Like I said in my finish post, this is a really unique gift for a baby shower, or a birthday/Christmas/holiday for any kid under 3. Kids are so visual - they love to see colors and feel texture, too (like wonderful cottony fabric :)) (and I think we can safely say that we quilters like feeling fabric too, just saying!).

1. Make your blocks. I made mine 10 inches wide by 13 inches long - but again, you could do 10 x 10 or any size you want (or smaller, if you want a tiny book). Just don't forget to account for seam allowance. I used a 1/4 inch allowance, as I usually do, so my blocks ended up being 9 1/2 by 12 1/2.
*Updated: 10x10 also works nicely!

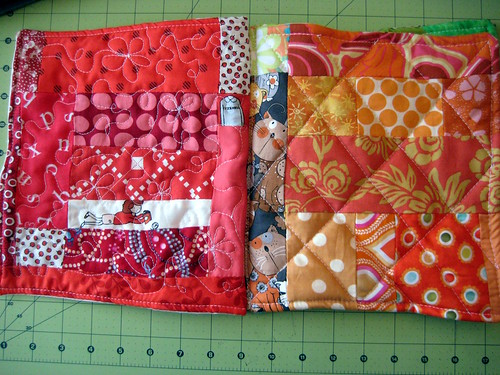
I made 7 - one for each of the following colors: red, orange, yellow, green, blue, purple, pink. However, you could just make themed blocks of animals, or doll fabrics, or whatever you have. The possibilities are endless, really! I also sewed together a cover, with appliqued letters on Kona white. This is where I chose to applique the label, like you would put on a quilt.

2. Decide on your layout. I laid mine in order, like this:

3. Place a piece of batting, cut the the same size as your blocks, on the table in front of you. Lay the "back" fabric" (aka, in my model, red, yellow, blue, pink) on top of the batting, face up. Lay the "front" fabric (cover, orange, green, purple) face down on top of the "back." It's like you're making a quilt sandwich. Pin in place.

4. Sew around the edge of the three pieces using a 1/4 seam allowance. Leave 3 -4 inch gap on one side (repeat with all pages).

5. Clip all corners to reduce bulk. Next, you're going to stick your fingers inside that little gap and pull out the fabric. You will end up with the batting between the two blocks, which are now facing outwards like they will be for the book.  

6. Press blocks again (just on the fronts, obviously!)

7. Topstitch around the whole block using a 1/4 inch seam allowance, tucking in the fabrics from the gap you left so that it gets sewn together (repeat with all pages). You should have 4 separate pages, with one block on each side. If you do, pat yourself on the back! The rest is fairly straightforward, but it will take a little patience.

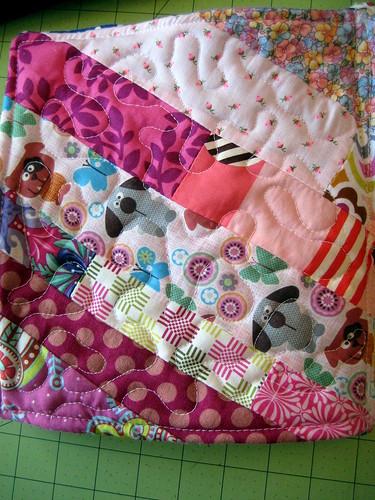
7. Quilt each block as desired. I wanted to do a different design for each one, so I got out my FMQ machine attachment or foot, whatever it's really called ;) , and got to work.


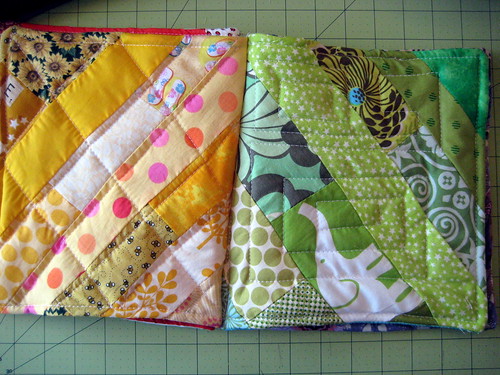
Pink block/page - fabric baby book

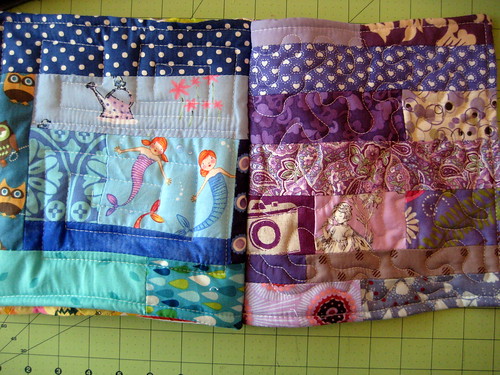
8. This is the part you will have to go slow with - and you could do it a few different ways, but this is what I did. Sew pages 1 and 2 together in a straight line on the binding - you can try to follow the top stitching you completed earlier. Then, do the same for pages 3 and 4. * when you do this, just make sure you line up the pages like you would for the final book.

Blue and purple blocks/pages - fabric baby book

9. Afterwards, you'll have 2 different books, and now you just have to sew them together, using a walking foot. I used long pins and opened to the front of the 2nd page (which was the color orange), and simply sewed another straight line down the binding of that page. It might seem sloppy, but if you sew straight lines (and I used white thread), it doesn't look bad.

(you can see the lines of the binding, here's a little snapshot)

One thing I could have done instead was try to sew actual thick binding onto the book spine, but I would have had to do that by hand (in order to not mess up the inside) - plus I'm not that confident in my hand sewing. I also think that sewing the way I did gave the whole thing the stability I needed.

Yellow and green blocks/pages - fabric baby book

So there you go! You have a baby book for the next cute baby in your life. Don't forget a label :)
Please let me know if you try this tutorial/what you think/if it works for you!

Linking up to Fort Worth Fabric Studio's Oh Sew Baby Linky Party.


Sunday, October 23, 2011

My Memories Suite 2.0 Review and Giveaway!

I have a great giveaway and discount code for anyone who loves scrapbooking and wants to try it digitally - from My Memories Suite!

I scrapbooked with my mom for years when I was younger, but fell out of it. I always wanted to do something nice with my pictures again (besides making photo quilts). This might be the key for me - digital! And then printing it out, of course :) Or sharing it on a CD (...OR turning it into a movie to watch on your iPod - how cool is that?)

I played around with some layouts before creating two pages - on the second one I got a little more daring. My Memories makes it very easy to get into your picture files and to get started right away creating your pages.
It's a little overwhelming at first (but in a good way) - there are endless options! However, I had a lot of fun scrapbooking digitally, trying out different backgrounds, fonts, graphic embellishments, etc. You can also download many free (plus for the college student!) backgrounds and layout packages on the My Memories website - and buy some, as well!

The only con I have encountered is that, with my laptop, it took about 2 hours to download. I'm positive it would be faster especially for a newer computer or a desktop computer - it also could have been my college's internet :) Either way, the end result was worth it! I can't wait to make more pages. It's extremely easy to use and it's absolutely the most fun I've ever had figuring out a program.

*My Memories is offering one of my readers a full My Memories Suite 2.0 software package - a $40.00 value!
You have several chances - leave a separate comment for each entry.

*Mandatory: go to the My Memories store and tell me your favorite digital scrapbooking kit OR album template - 1 entry
Extra:
*Follow my blog (I know the Google Friend Connect box keeps disappearing but keep trying!): 1 entry
*Follow the My Memories blog - 1 entry
*Like My Memories on Facebook - 1 entry

--Plus, with this special code, my readers can get a $10 discount off the purchase of the My Memories Suite Scrapbook software and a $10 coupon for the MyMemories.com store - a $20 value! Use this code (copy and paste is your best option): STMMMS99430

Good luck! The giveaway runs until Sunday October 30. I will pick by Random Number Generator, email the winner, and announce it here. If you are a no-reply blogger, please leave your email so I have a way to contact you.

P.S. Fabric baby book mini tutorial to come tomorrow or Tuesday!

Thursday, October 20, 2011

Favorite Things Friday #6: Selvage Edition

What do you do with your selvages? (P.S. According to Wikipedia, it's "selvage" in the U.S. and "selvedge" in Britain - well, what d'ya know!) I've been throwing mine into a basket (which grew into 2) for the last year and half, but I'm hoping to make a quilt or some small projects with them soon. That got me thinking about inspiration for projects:
(click on pictures for Pinterest sources)

https://www.pinterest.com/pin/233624299394399413/


You could make a selvage quilt... though I shudder to think how long this must have taken, it's absolutely gorgeous.

OMJesus this is awesome! A bookshelf quilt made from selvedges. I wish I knew who the quilter was to give proper credit! This is amazing!
...or a selvage bookshelf quilt (I'm a little obsessed)...

(UPDATE: The original pin has been removed, and I have been unable to locate the source of this quilt. I apologize - I pinned this when Pinterest was in its infancy and I don't know who made it.  If anyone knows who made this quilt, please let me know!)

Selvage mug rugI think this could be a good hot pad with all my leftover insulation batting.

...or a cute selvage mug rug or pot holder (look at those owls!)...

It's always fun to find new ideas about using selvages. Selvage Star on Twin Fibers ... LOVE!


... or a selvage star (by Twin Fibers)

The Market Tote from Pleasant Home - in selvedges

...or a purse (you can make the handle/strap selvagey too!) (by Pleasant Home)...

Selvage Blog: Selvage Skirt

...or a SKIRT (by  Rachel van Tilborg) (I'm in amazement)...

Selvage Spool Block @ Riley Blake Designs: Thank you for viewing our Block of the Month tutorial! Here you will find each months Block pattern as they become available. Just click on the image of the pattern you would like to download. If you haven't already, please view our video tutorials on how to make the quilt block you are interested in.

...or a cute block (by Riley Blake Designs)...


Quiltergeist by Riel Nason. Original Design Selvage Quilt 2014

...or you can be like Riel, who is amazingly amazing and creates things like this!!

So... are you inspired? :)


Tuesday, October 18, 2011

Playing catch up and Rainbow Fabric Baby Book

Well, it's been super busy around here, without having internet for a couple of days and plenty of sewing (plus - booking our wedding - October 7, 2012!!!)! Here's what I've been up to lately.

IMG_5444

My big finish for the week is this rainbow fabric baby book (I talked more about my inspiration here). I'm really happy with it and I'm sending it off to my beautiful 1 year old niece in tomorrow's mail!

IMG_5445

I had crazy fun quilting this thing. :) And I loved being spontaneously scrappy! I looked for fabrics that would be bright and cute for kids.

IMG_5446

I wanted her to be able to touch/feel/see the colors, and I put batting in between the pieces to make it soft.

IMG_5447

I think it's a really unique gift - for any baby. Try it out! You can just use scraps!

IMG_5448

Does anyone want a mini-tutorial on this? I'll write one if you let me know!
[tutorial posted HERE]


Made a few new Harry Potter inspired lanyards for the shop. I have a couple of listings waiting in the wings, too. Each one is unique and I absolutely love making them.

Cutting t-shirts for a commissioned t-shirt quilt.

Making a very special t-shirt (don't want to reveal yet in case this person actually does read my blog. :)

Starting knitting my sister's Christmas present - a Slytherin House scarf! (she's in Slytherin like me on Pottermore) - it doesn't look much yet but I realized how much I missed knitting! I'll be working on this at school, when I'm calling alumni at work =P and catching up on How I Met Your Mother...

And now... back to my regularly scheduled midterms and thesis writing =/... 2 more months!

I'm linking up to:
Sew Happy Geek

Fresh Poppy Design
rocaandcompany


LinkWithin

Related Posts Plugin for WordPress, Blogger...