Wednesday, October 29, 2014

Oakshott Challenge on Sew Mama Sew today!


Just a reminder that I'm on Sew Mama Sew today as the last Oakshott Fabrics Challenger this fall. I made a Star Within Table Runner; it's made up of an original block using half square triangles (HSTs) and half rectangle triangles (HRTs), plus improv scrap piecing. You can find the block tutorial and original post here.


The back was pieced with scraps and improv curves. Some of my favorite things. :)


Thanks again to Oakshott and Sew Mama Sew for a chance to participate and work with these lovely fabrics! Don't forget to visit the other challengers:


Mary Claire King of Remember Wren
Michelle White of Falafel and the Bee
Nicole Neblett of mama love quilts
Sara Peterson of knottygnome crafts 


Tuesday, October 28, 2014

To Teach, Part 2 + Class News

Last week I taught the second of 2 classes of Orange Peels and Improv at my LQS, Pennington Quilt Works (see part 1 of my class here). My 8 students (a full class!!) are making quilts based on my baby quilt, Scatter. I seriously can't wait to share pictures of their tops/finishes with you in the future (with their permission, of course)!

 Robin got a head start with her layout!

First, I explained the basics of improv piecing and how I pieced my quilt together. The method I like to use is "planned"improv sewing. I gave my students a bunch of ideas to try and methods to use, and they were off making! I took a few pictures of their progress throughout the night:


I'm happy to announce I'll be teaching a modified version of this class at Mid Atlantic Mod Sewing Retreat in Lancaster, PA, from April 23-26!!! Registration opens for sponsoring Modern Quilt Guilds on Nov. 1, and general registration opens mid-November. You can sign up for the workshop when you register - all workshop info is here.

In addition, due to popularity, this two session class will also be running again early next year at Pennington Quilt Works! Stay tuned for dates if you are in the NJ/PA/NY/DE area. :)


Meanwhile, my second orange peel top is still progressing... I hope to have the top done by the weekend. Improv piecing can be super time consuming but also quite freeing. I'll just keep chugging along... for the first time in forever (cue Frozen music), I'm pouring my heart and soul into just one project. And it feels good.

Friday, October 24, 2014

For Baby Kevin: A Finished Quilt

 *This quilt is on my Finish A Long Quarter 4 list - here are my original goals. I'm linking up to The Littlest Thistle!*

Woohoo to Friday finishes! This quilt is for my wonderful neighbors and their new baby boy. One of my first baby quilts went to their second daughter! Crazy! I tested the Sunset Strips pattern by Brenda Ratliff of Pink Castle Fabrics (it's coming soon!). I wanted the quilt to showcase the prints, so I left out the sashing in between rows. The quilt measures 36" x 41" but the pattern allows for all kinds of sizes and customization.


The (now) mother of three loves green; I hoped this color scheme would be a welcome addition to the baby decor. While the print placement might look random, they were actually planned out - there's a method behind the madness. :) I was inspired by Brenda's layout in the pattern and decided to keep light greens and blues on the outside with medium greens in the middle. This created a staircase-like pattern.


However, I felt like it needed to be a bit bigger when all was said and done (and I didn't want to make more blocks ----> lazy quilter) so I cut borders that vary slightly (one is a solid and the other is a Timeless Treasures Sketch print). I also rarely use borders on my quilts but they seemed to work here!


Many of the prints I used are unintentionally forest-themed. The back is made of scraps and some perfectly matching stripey yardage from my stash. Don't you love when that happens?

This quilt was begging for straight line quilting! By the end, though, I was itching to get out my FMQ foot for the borders. I recently tried out this fun design on a baby quilt - it's fast, easy, and effective. Is it just me, or is FMQ faster? I guess it depends what you are doing. I often find straight line quilting tedious.

Either way, I gave the quilt away today and all loved it! Just as I hoped. Another baby quilt for another beautiful baby!


Blogger's Quilt Festival: Scatter

For my Fall 2014 Blogger's Quilt Festival entry (in the Original Design category), I'm sharing one of my favorite projects from this year: Scatter, my first orange peel and improvisationally pieced quilt! I wanted to make a modern orange peel quilt, and I decided to experiment with scattered peels. It came out exactly as I hoped it would!


I originally created this quilt for a dear neighbor back in June. I was going to give it to her if she had a girl. Then, Jan, the owner of my LQS, Pennington Quilt Works, liked it so much that she asked me to teach a class. It hung in the store for a couple of months (!) and now that the class is over, it's back in my clutches. But my neighbor just had a boy, so I made a whole other quilt ;) (to be posted shortly!). It's just as well because I'm not ready to give Scatter away.


In my class, I discussed my design process and encouraged my students to "let it go" as they pieced. We learned and practiced methods for improv piecing - it doesn't have to be a "free for all!"


 I sketched my vision for the quilt at the very beginning: I wanted to feature Anna Maria Horner's Pretty Potent fabrics in a rainbow burst from the middle of the quilt. I included just one "full" orange peel at the very bottom on purpose. Finally, I pieced a couple of gray scraps into each panel before I sewed the whole thing together; looking back, that's my favorite part!


This quilt was witness to many "firsts" for me and I've been working on another for my mom with different-sized peels. Scatter definitely sucked up part of my soul, and I wouldn't have it any other way.


 I backed and bound it with one of my favorite prints from Anna Maria Horner's Dowry and quilted with my free motion foot all over (changing up the design at my leisure). I also quilted one full ghost peel in the middle, which you can see here! This picture makes me super happy. :)

Thank you for all of your support and encouragement this year through the Orange Peel QAL and my very first class! I'm happy to say that I'll be teaching another section of the class at Pennington Quilt Works early next year, so stay tuned for those dates!

Quilt Stats:
Size: 44" x 55"
Pieced and quilted by me on my home machine
 Original post here

Make sure to check out Amy's lovely Blogger's Quilt Festival - eye-candy for the quilty soul!

 photo Fall-2014-BQF-Button.jpg

My past Blogger's Quilt Festival entries:


Tuesday, October 21, 2014

WIP Wednesday

I'm playing with scraps tonight! Since Monday night was the second and last session of my Orange Peels and Improv class (more about that soon!), I'm inspired to keep working on and soon finish my second orange peel quilt. This one was requested by my mom for the master bedroom, and it will be backed in some lovely Anna Maria Horner flannel. I haven't shared much of this quilt yet. It combines large peels with normal-sized peels... and now very teeny peels!


The baby ones run about 2.5" from tip to tip. I'm hoping they won't get lost in the overall scheme of this (queen sized ridiculously large) quilt but that they'll be a small, fun detail. I haven't laid them down on the carpet yet.


To be continued...


Sunday, October 19, 2014

Cascade Fabric Blog Hop: Gentle Improv Curves Pillow and Giveaway

 *The giveaway is now closed and the winner has been contacted. Thanks to all who entered!*

Jessica Levitt is one of my best quilty friends in real life. I don't know how I got so lucky! She's amazing and she's my CJMQG partner in crime (basically, when you say "Jess?" one of us will answer). When I found out about her new fabric collection with Windham, Cascade, I knew I wanted to be involved somehow! You can see the whole collection here on Windham's website, and the official Cascade Look Book here (I'm on page 13!).


The colors are a departure from my customary bright/saturated fabric choices, but I love the calmness they exude and the art deco theme that Jess has infused into her work. These fabrics are perfect for home decor, and with that in mind, I decide to make a pillow (which is now going to Quilt Market - *hyperventilates*). The motifs and the name "Cascade" got me thinking about flowing water, which led me to improvisational curves. 
Gentle Improv Waves Pillow 
18.25" x 18.25" (fits 18" pillow form)


Update 12/2015: I used to have a tutorial for this pillow posted, but it is now a class that I teach regularly. Please visit my Classes and Lectures page for booking information. Thanks for understanding!


 ------------------------------------------------------------------------------------------------------------------

Giveaway

Thanks Jess for making me a part of your blog hop! Cascade will be shipping early 2015. If you'd like to get your hands on some now, Windham is generously giving away a fat quarter bundle of the whole line to one of my readers! To win, please tell me about the "coolest" water you've ever seen or would like to see (pictures count). Mine was when I snorkeled in the Caribbean - I couldn't get over the clear, calm, blue water!

My followers on here or Instagram get a second chance - just tell me how you follow and post a second comment. This giveaway is open to anyone in the world until Oct. 23 at 8pm EST.


Be sure to check out the other blog hop stops:
Monday October 13th - Jessica Levitt - Juicy Bits / Windham Fabrics
Tuesday October 14th - Julie Herman - Jaybird Quilts / Jenn Nevitt -knit ’n lit
Wednesday October 15th - Amanda Kattner - What the Bobbin / Andy Knowlton - a bright corner
Thursday October 16th - Marci Debataz - Marci Girl Designs / Jennifer Auh Chon - Sunny in Cal
Friday October 17th - Angela Walters - Quilting is my Therapy / Rachel Gander - Imagine Gnats
Saturday October 18th - Elizabeth Timmons - and pins / Andrea Taddicken - knitty bitties
Sunday October 19th - Erin Erickson - Dog Under my Desk / Jessica Skultety - Quilty Habit
Monday October 20th  - Caroline Press - Trillium Design / Karin Jordan - Leigh Laurel Studios


Tuesday, October 14, 2014

Sew Mama Sew Oakshott Challenge Table Runner + Star Within Block Tutorial

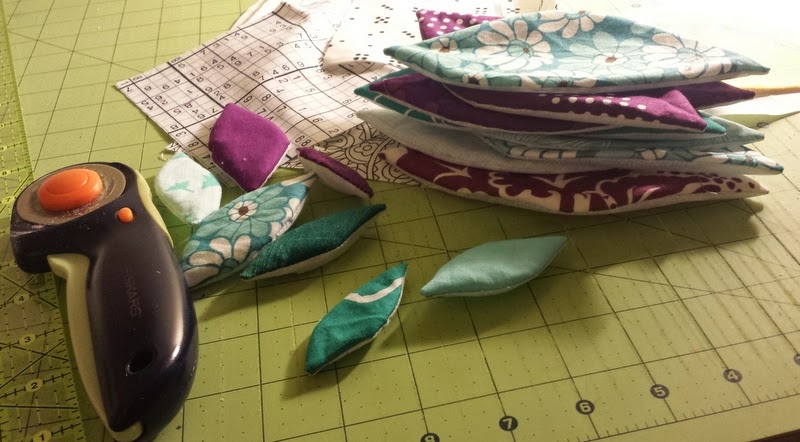
I'm ecstatic to participate in one of Sew Mama Sew's Oakshott Challenges! Our challenge was to create table linens with the new Lakes collection of Oakshott shot cottons. I couldn't believe all of the shimmery wonderfullness that fell out of the mail mid-September!


Shot cottons change colors in the light - you have to see it to really believe it. I love these Oakshott fabrics because they are a bit thicker and easier to work with than quilting cotton (in my opinion). Plus, they have more dimensionality than regular solid quilting cotton. So, so pretty. Plus, these colors were my favorites - purples to pinks to a wide range of blues. Mmm.


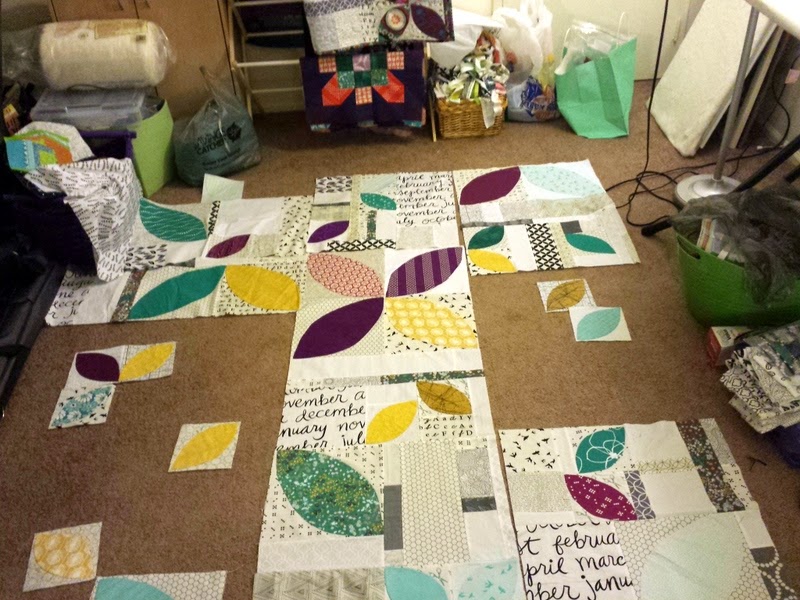
I decided that a table runner would show off the fabrics beautifully. I've had this block design in my sketchbook for a while - it combines half-square triangles (HSTs) with half-rectangle triangles (HRTs). It's a traditional block (I haven't found a name for it, so I'm calling it my creation at the moment), and you can easily merge with modern elements as I have with this tablerunner (I added randomly sized scraps to the sides). See below for the block tutorial!


The quilting was more planned out than usual - I used my Hera marker to make radiating stars. I decided to quilt the scrappy ends with wonky/organic lines to give off a more modern vibe. Again, I used my trusty Aurifil light gray thread (I'm not sure exactly which color because I switch between several).


For the back of the table runner, I pieced together my blue and teal scraps to make some improvisational curves In case you didn't already notice, I love to make quilts double-sided so they serve a double purpose. Now I have the same opportunity with this table runner. I see myself using this side in the summer! You can see from the above picture to the one below how the Oakshott colors change depending on the light and where you stand in the room. Seriously amazing! Oh, and I love how the quilting from the front made hexagons on the back. :)


Make sure you check out Sew Mama Sew the week of October 22-25 to see the challenge highlights and enter to win Oakshott fabric! Until then, you can check out the other sewists who have whipped up some surely beauteous Oakshott projects:


Mary Claire King of Remember Wren
Michelle White of Falafel and the Bee
Nicole Neblett of mama love quilts
Sara Peterson of knottygnome crafts 


Thanks to Sew Mama Sew and Oakshott for the chance to work on this project!


Ready for the tutorial? Please let me know if you make something with this block - I'd love to see! :)


Star Within Block - 14" block
All seam allowances - quarter inch
Please read all directions before starting! 

Materials:
*I used fat eighths of several Oakshott fabrics to make these blocks, and had much left over for the ends of the tablerunner and the back. You could easily make these blocks with scraps, too!
  • (4) 3.5" x 5.75" rectangles of fabric for star (half rectangle triangles/HRTs) - light blue in tutorial
  • (4) 3.5" x 5.75" rectangles of contrasting fabric for star (half rectangle triangles/HRTs)
  • (2) 5.875" (7/8th) squares - fabric for surrounding half square triangles (HSTs)
  • (2) 5.875" (7/8th) squares - constrasting fabric for surrounding half square triangles (HSTs) 
  • (1) 5" square for middle strip (matches with HRTs) - light blue in tutorial
  • 1" x 5" strip of contrasting fabric for middle of star (OPTIONAL - see below)
  • Hera marker or some kind of marker for fabric
  • Rotary cutter and ruler
  • Sewing machine
 ^All the necessary fabric requirements. They just shimmer!


To make the outer HSTs (half square triangles):
Pin your 5 7/8ths squares right sides together (1 color with the other). Draw a line with your Hera marker down the centers. I used a Hera marker for two reasons: 1) It's easily my favorite fabric "marker" because 2) it doesn't leave marks when you are done. No ink to worry about. No stains. Just an indentation in the fabric. I'm not getting paid to say that or anything - I really just love this tool!


Sew a quarter inch from the line on either side (you can chain piece these if you wish). And yes, my sewing machine, Elsa, has swag.


Cut along the line with your rotary cutter.


Press to the side and trim to 5" square. Now you have 4 HSTs!


Note: You may want to cut your original squares to 6" or larger if you are working on accuracy. If you are pretty confident about your HST-making abilities, the set amount is perfect.
 
To make the inner HRTs (half rectangle triangles):

These are much the same process as HSTs. Read on...


 I found this tutorial by Buttons and Butterflies to be thorough and easy-to-follow that I'll just send you over there. I promise, if you haven't done them before -they are simple! Just use my measurements instead, and follow these steps beforehand:

Match up 2 of your light blue star fabrics with 2 dark blue star fabrics (PILE 1). Do the same for the other 4 pieces of fabric (PILE 2). Pile 1 will be marked one way, according to the tutorial:


Pile 2 will be marked the other way:


You MUST make sure to do this or else your diagonals will all be the same direction! Follow the tutorial and trim to 2.75" x 5" when you are done. You should have 8 HRTs per block (4 of each diagonal).


To make the "middle strip" in the star center:
This part is optional, but I love the depth it gives to the block. Plus, you can alternate the way the line lies (horizontally or vertically) if you lay several of these blocks in a row as I did. 


Take your 5" square for the middle of the star (the light blue fabric here) and cut straight down middle at the 2.5" mark. Sew the 1 inch strip where you cut (it will come out to 1/2" wide after seam allowances). Press it to the sides (outwards towards square). Trim to 5". If you sewed and pressed accurately, it should come back out to a 5" square (no trimming necessarily). If you are practicing accuracy, cut a 5.5" square to start and then trim after sewing in the middle strip.

 
 ^An unpressed version of the middle 5" block finished.

Lay out all of your blocks. 
 

Sew the HRTs together first. Then, sew all three rows across separately. Press in opposite directions to nest seams. 


 Then sew all the rows together, and you have a beautiful block! 


LinkWithin

Related Posts Plugin for WordPress, Blogger...