
*Updated: 4/8/2013
I had a few requests for a mini tutorial, so here we go! It's an awesome, scrap-busting project - I hope you'll try it out!
I had a few requests for a mini tutorial, so here we go! It's an awesome, scrap-busting project - I hope you'll try it out!
Like I said in my finish post, this is a really unique gift for a baby shower, or a birthday/Christmas/holiday for any kid under 3. Kids are so visual - they love to see colors and feel texture, too (like wonderful cottony fabric :)) (and I think we can safely say that we quilters like feeling fabric too, just saying!).
1. Make your blocks. I made mine 10 inches wide by 13 inches long - but again, you could do 10 x 10 or any size you want (or smaller, if you want a tiny book). Just don't forget to account for seam allowance. I used a 1/4 inch allowance, as I usually do, so my blocks ended up being 9 1/2 by 12 1/2.
*Updated: 10x10 also works nicely!
*Updated: 10x10 also works nicely!

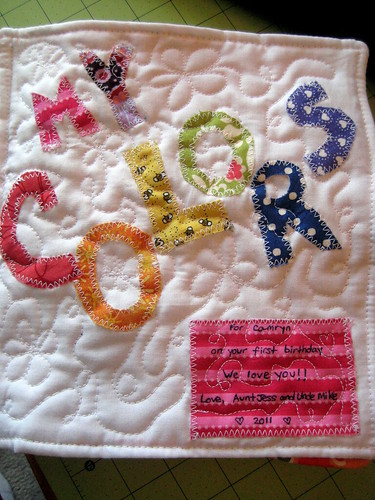
I made 7 - one for each of the following colors: red, orange, yellow, green, blue, purple, pink. However, you could just make themed blocks of animals, or doll fabrics, or whatever you have. The possibilities are endless, really! I also sewed together a cover, with appliqued letters on Kona white. This is where I chose to applique the label, like you would put on a quilt.
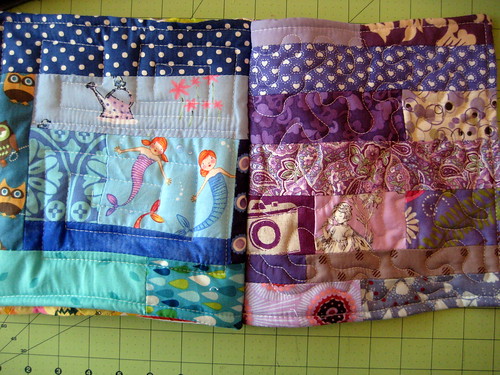
2. Decide on your layout. I laid mine in order, like this:

3. Place a piece of batting, cut the the same size as your blocks, on the table in front of you. Lay the "back" fabric" (aka, in my model, red, yellow, blue, pink) on top of the batting, face up. Lay the "front" fabric (cover, orange, green, purple) face down on top of the "back." It's like you're making a quilt sandwich. Pin in place.
4. Sew around the edge of the three pieces using a 1/4 seam allowance. Leave 3 -4 inch gap on one side (repeat with all pages).
5. Clip all corners to reduce bulk. Next, you're going to stick your fingers inside that little gap and pull out the fabric. You will end up with the batting between the two blocks, which are now facing outwards like they will be for the book.
7. Topstitch around the whole block using a 1/4 inch seam allowance, tucking in the fabrics from the gap you left so that it gets sewn together (repeat with all pages). You should have 4 separate pages, with one block on each side. If you do, pat yourself on the back! The rest is fairly straightforward, but it will take a little patience.
6. Press blocks again (just on the fronts, obviously!)
7. Topstitch around the whole block using a 1/4 inch seam allowance, tucking in the fabrics from the gap you left so that it gets sewn together (repeat with all pages). You should have 4 separate pages, with one block on each side. If you do, pat yourself on the back! The rest is fairly straightforward, but it will take a little patience.
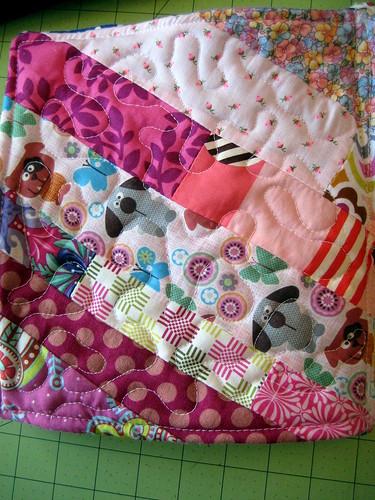
7. Quilt each block as desired. I wanted to do a different design for each one, so I got out my FMQ machine attachment or foot, whatever it's really called ;) , and got to work.


8. This is the part you will have to go slow with - and you could do it a few different ways, but this is what I did. Sew pages 1 and 2 together in a straight line on the binding - you can try to follow the top stitching you completed earlier. Then, do the same for pages 3 and 4. * when you do this, just make sure you line up the pages like you would for the final book.
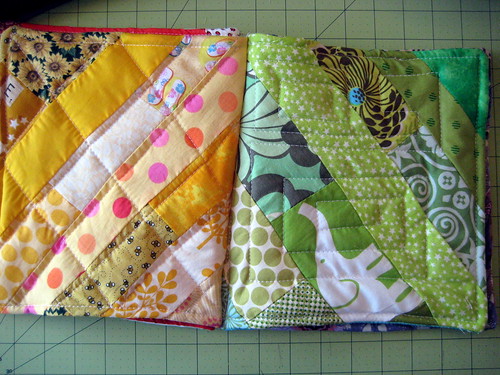
9. Afterwards, you'll have 2 different books, and now you just have to sew them together, using a walking foot. I used long pins and opened to the front of the 2nd page (which was the color orange), and simply sewed another straight line down the binding of that page. It might seem sloppy, but if you sew straight lines (and I used white thread), it doesn't look bad.

(you can see the lines of the binding, here's a little snapshot)
One thing I could have done instead was try to sew actual thick binding onto the book spine, but I would have had to do that by hand (in order to not mess up the inside) - plus I'm not that confident in my hand sewing. I also think that sewing the way I did gave the whole thing the stability I needed.
So there you go! You have a baby book for the next cute baby in your life. Don't forget a label :)
Please let me know if you try this tutorial/what you think/if it works for you!
Linking up to Fort Worth Fabric Studio's Oh Sew Baby Linky Party.
Linking up to Fort Worth Fabric Studio's Oh Sew Baby Linky Party.


What a great tutorial.
ReplyDeleteI finished a commercially printed cloth book yesterday; it's a similar process.
Good job on this tutorial. I loved all the pictures! I can't wait to make one!
ReplyDeleteWow, what a great idea. My seven month old is always trying to tear out pages of books or eat them, but a cloth book would be great! I will have to try this very soon!
ReplyDeleteSuper cute idea and thanks for the tutorial!
ReplyDeleteThis is awesome!
ReplyDelete