Friday, January 27, 2017

Tips for sewing on quilt sleeves


Once you've finished a quilt and it's ready to be hung, you need to sew on a quilt sleeve. It's a long piece of fabric that can only be hand-sewn onto the back of the quilt* (if you sewed it on by machine before you quilt the whole thing, it would just get quilted over. I've thought about alternatives many times, and I feel like if someone could magically do mine, I could kiss them!).

*EDIT: Thanks to Ben and Meli who mentioned using a blind hem stitch to attach after the quilt is done - you can see a tutorial here by Lee Heinrich for Bernina. If you have the right equipment, this could work for you, too!


I find it a pain to do - mostly because you're dealing with large swathes of fabric, which you have to fashion into long tunnel-like contraptions, pin accurately to the quilt, and then hand sew. I'd much rather be working on another project! However, using Jacquie Gering's easy, picture-heavy quilt sleeve tutorial makes things a little easier.

Anyway, since I've sewn almost 20 quilt sleeves over the last month for my solo exhibition in March (phew, someone please get me some hand lotion and a glass of wine, stat), I've compiled a few pointers. I'm no expert but I hope these do help someone out there.

Monday, January 23, 2017

"Hear Our Voice" - A Quilt for the Women's March on Washington

A quilt's place is in politics. At least, that's how I feel (see this post by BLOCK and this article from the Quilt Index for some excellent examples) and I'm not afraid to share my beliefs. If you don't agree, that's totally okay - feel free to bypass this post. If you leave a comment, please be respectful. I will respond to everyone I can find an email address for!
 
A couple of weeks ago, I decided to attend the Women's March on Washington, D.C. on January 21, now known as probably the largest political protest in America (and supported by many marches around the globe). I had been waffling about it for a while. Would my attendance really mean something? Was it worth it? It meant a lot to me, and it certainly was. It was positive, peaceful, constitutional, and surreal.


Last weekend, 7 days before the March, I was talking with my close friend Jess Levitt (@jtlevitt) about signs. She mentioned making a quilt, which had also crossed my mind a couple of times. As a quilter, I'd rather make a quilt that will last than a sign that probably won't. Plus, since this was a "Women's March" and women are traditionally associated with sewing, it would be a really cool way to send a message. Was that crazy, especially when the march was so soon? (Yes). Would it make a difference? (Hopefully). Could it be done? (Probably). At first we considered making one quilt to show together, but it made more sense for us each to make our own smaller quilts.


  Pictures both by Lori Saporito

I started with the idea of the female symbol. It's so telling and universally recognized. While I'm not a huge pink fan (readers know my favorite, overused but never underappreciated color!), it packs a punch. It's also the universal symbolic color of women (though personally I resist against that type of thing) and, as I'm sure you've noticed, many of the marchers were making pink hats. I figured I'd fit right in.


Wednesday, January 18, 2017

Article - Craft Teacher Contracts and Deposits

I'm excited to let you know about my latest published article, "A Guide to Contracts and Deposits for Craft Teachers," over in the Craft Industry Alliance Journal (you must be a member to read it). This is a topic that I've been itching to write about for awhile, as I'm so passionate about it.


 "Waterfall Quilt" class with the Baltimore MQG, August 2016

So many quilters have asked me for advice about starting to lecture and teach; to me, setting up a contract and deposit system is vital. In the article, I explain why it's important to stand up for yourself, and lawyer and designer Carol Sulcoski wrote up a thorough sample teaching contract for download. Finally, I interviewed four other well-known craft instructors who also use contracts and deposits: Melissa Leapman, Jessica Levitt, Patty Lyons, and Jenelle Montilone. Thank you so much for your contributions, ladies!


While I'm talking about it, I want to mention how much I enjoy and value being a part of the Craft Industry Alliance (I was paid to write the article but not to say this!). It's so valuable to discuss relevant issues and support 1,000+ other instructors, writers, designers, and bloggers. I appreciate all the work that Kristin Link and Abby Glassenberg have done to run it the past year.

Hope you're sewing today! I'm preparing for this weekend in earnest. More soon...

Monday, January 16, 2017

A gifted pillow

This is the 5th year my guild, the Central Jersey Modern Quilt Guild, has thrown a January holiday party (December is wayyy too crazy), and I look forward to it every year. We vote in our new executive board, eat snacks, and run the Secret Quilter Gift Exchange. I've found my in-person quilty home with these ladies (so far we have no men, but men are certainly welcome!). It's a grand old time!


This year, my secret recipient was my friend Sonia @soniabegoniasonia (it's always the most fun when you get someone you already know well!). I greatly admire Sonia especially for her bag-making and garment skills, so I knew I was going to stick with what I know (read: quilts). Plus, she shares with me a love of Anna Maria Horner fabric, so it quickly became clear what I would make for her.


Instead of being super scrappy and possibly complicated, I decided a pillow with simple improvised strips would do the trick. Sonia loves a cool color palette like me, so I could easy just keep this pillow for myself! Heh. I didn't, promise. Some dense hand-stitching provide a unique texture to the strip sections (I even used some of my Loominous scraps here - Sonia should know that I REALLY love her!). I'm still fascinated by the combination of hand and machine stitching. This will be a theme in my work for a long time, I'm sure. I just want to try everything.


For the pillow back, I sewed up something only a fellow sewist can truly appreciate - an envelope backing made almost entirely of selvages. Even some really, super special Cotton + Steel ones. The selvages wouldn't be super comfortable on a pillow, IMHO, but you don't rest your head on that side anyway. It was so fun to pick and choose selvages based on her likes and the color palette.


Luckily, Sonia loved it! And I received a Hamilton (the musical) mini quilt and tons of little gifts from my friend Maggie, our webmaster and photographer (@squishythings - she also took the photos above for the @cjmqg Instagram account). I was so surprised and pleased! It's already hanging on my mini quilt wall. If you know the musical, you'll recognize the quilting around the star!


I've had a rule the past couple of years about swaps (in that I only participate in certain ones). This is one that's always at the top of the list, and I'm sure it will be for a while. Now my holiday sewing is *officially* over, haha!

Linking up to Fabric Tuesday, Needle and Thread Thursday, TGIFF, Crazy Mom Quilts.


Friday, January 13, 2017

Teaching Orange Peels and Improv: Behind the Scenes

My classes at The Quilt & Sewing Fest of New Jersey in March are coming up fast, so I thought I'd go into a bit more detail about each one (I also was interviewed recently! Fun, right?). Plus, I can explain how it works on my end/from the teacher's perspective! Maybe you'll join me in class? There are a few spots left!

 "Soar" - currently hanging at the Ontario Museum of History & Art - photo by Georganna Hawley.

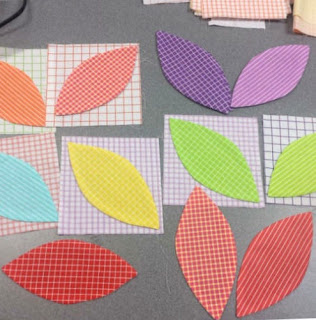
Orange Peels and Improv, which runs from 9-4 on Thursday, March 2, is my most popular workshop. It's the best of both worlds - traditional patchwork and modern improvisation - and it's appropriate for confident beginners and up. The class changes every time I teach it. 

This is what I love most about teaching sewing - I am not a robot. My students aren't, either. We go with the flow, and I add more tips and ideas that I've discovered from watching and helping other students. You can have a plan going into a class, but you can never predict how you'll change instruction once you get there (as I've explained in detail before).


I revel in having the opportunity to walk around class and help on an individual basis. Sometimes students just want confirmation that they are executing the orange peel technique correctly. Others like to bounce color and placement ideas off of me. It's relaxing, encouraging, and most importantly, fun. I like to put on music and usually bring baked goods to share (breaks from sewing are encouraged!)


My favorite part about the first section of this class is marveling over students' color combinations (everyone else loves looking at fabric, too!). Once we've discussed the general idea of making a quilt like this, I lead students through orange peel making and everyone gets to work. There's usually not enough time to make too many peels - if the class is over two sessions, students have to finish their homework (make the rest of their blocks).

Laura's blocks (all pictures shared with permission)

The second part of class is very experimental and freeing - the complete opposite of making blocks. My goal is to encourage quilters to embrace their improvisational side (everyone has one - really!).


I explain several improvisation techniques and show different ways to put together a quilt top. Then, students start to sew. Improvisation can be time-consuming; you don't usually make more than a couple of small panels, but you are prepared to go home and create more. Once, I had a student attend another class of mine, and she brought her completed quilt!

 Donna's completed orange peels and improv quilt

 Kathy's finished orange peels and improv quilt

Others try improvisation and find it's not something they enjoy, so they don't force it, or they decide to continue with a more traditional orange peel quilt. This is a lovely option that I wholeheartedly support!

Robin's orange peel quilt

At the end of class, we do a show and tell of all work, and I send around a class survey (sometimes I even do this electronically, later on). It's very important to me to hear your constructive criticism, comments, and questions.

I can't wait to see the results after this upcoming class! If you'd like to get in on the fun, click the link here. Bonus - you'll get a special, mini tour of some orange peel quilts in my special exhibit at the quilt show itself!

Wednesday, January 11, 2017

New Year, New Notions

Reevaluating comes naturally to me in a new year. Which projects do I want to continue? Which ones do I want to start? What big events are coming up that require a quilt or handmade gift? Late last year, I started preparing for my guild's upcoming February Spark Joy event, where we bring in sewing items to exchange or giveaway that no longer bring us joy. In the middle of this process, I noticed my sewing supplies in general needed a little refresh.


Have I mentioned that I'm a lazy hand sewer? Allow me to explain. I don't do a lot of handwork compared to machine work. I've been storing ALL of my hand sewing needles on a cute little needleminder (circular device about an inch big). This is not ideal for portability, even when it's in a bag, or for finding the right needles (though I don't do tons of handwork in general, I do seem to have accumulated lots of different needles). It was frustrating and time for a change... but what to do?


I discovered, to my glee, a small piece of cross stitch that I had started at the beach a couple of years ago but never finished (pattern is by Anna Maria Horner). I decided to finish it off (after all, it was only a couple more hours of work) and repurpose it into a small, handy needlebook (tweaking this tutorial from Nana Company). I couldn't resist adding some hand stitches to the borders (chosen favorite scraps) and backing. The best part is that I could make it to exactly fit into my sewing pouch! Making custom things rocks.


So now, when I go to handsew (which is a lot these days, as I'm preparing 20 quilts for my exhibit), it's SO EASY. I even marked each category (in a very rudimentary way - I may handstitch over them one day). Why didn't I do this before? Anyway, it makes a huge difference, and I'm thrilled to have a new handmade tool/notion around.  


That wasn't all. First, I realized I was getting quite low on Best Press (I buy big refill bottles). Then it was bobbins - I was working on so many projects that my bobbins were nearly all used up. With that I threw in a new bobbbin case (not pictured - I ended up buying even more bobbins after this! I do a lot of quilting!). My safety pins, which I use mostly for basting, were dull and well-used. Why not?


 And last but certainly not least, I have two new pairs of scissors. The top are pinking shears by Handi Stitch - when I was making handmade ornaments, the tutorial called for pinking shears and I couldn't think of a better way to do it at the time. Plus, I find myself always needing pinking shears but never having them. When else is a better time to invest? And then, my pride and joy - Mike bought (at my request, for my birthday/the holidays) 8 inch professional Kai scissors (7205). I've never had real fabric scissors (I've been using old kitchen shears for a while now) and these make cutting A DREAM. They cut like butter. Fabric, no matter how thick or layered, is simply a fluffy cloud. I could go on and on, but the point is, I literally use them every day.

New year, new notions. Stock up. Get ready for all the sewing to come. These small purchases prepared me, and I'm making this reevaluation a yearly tradition. (By the way, no paid advertising or anything, I really just love all these products!).

So, did you restock anything for a new year, or do you see yourself doing so soon?

Friday, January 6, 2017

Why YOU Quilt Your Quilts - A Follow Up Post

I didn't plan to write this post, but your response to my last post, Why I Quilt My Own Quilts, has been overwhelming. Wow! (By the way - I respond to all comments and I'm still at it - so if you don't get an email within the next couple days, it's probably because I can't locate your email address. I respond directly on the blog post itself when this happens).

I was in the process of quilting "Echo" this time last year.

Anyway, I thought it would be interesting to reflect on the responses in general! A lot of you participated, responded to other blog comments, and "liked" comments on Instagram, so you all seem to be as curious as I am about why people decide to quilt their own quilts.

About 80% of you who say you quilt on your own (this is 90+ comments on the blog and Instagram together) said one or both of the following:

1. The cost of longarming doesn't mesh with your budget (my main reason!).

2. You quilt because you want ownership of the whole quilt. You want to or love to make it from beginning to end.

I expected #1. So many of you echoed a situation like mine: you are/were a student, you have loans, you have a young family with one income, or what have you. Many of you, no matter what income, want to finish your quilts and be able to make more - which means spending any quilting money on more fabric or supplies instead of a professional finish. It's utilitarian and still a beautiful way to finish quilts (especially if you love the quilting process itself and practice!).

 Quilting can have an impact on design, if you make it so. This is a blurry accidental shot of Crown of Orchids - you can see that dense crown of white thread very clearly!


#2 - wow. SO MANY OF YOU said this! I lost count. Many nodded their heads in agreement to being in control of the whole product. Some of you mentioned the wonderful feeling of entering quilts into shows and winning an award or being recognized for your work and your work alone.

Some commented that the "handmade" and "imperfect" feel is much preferable to computerized quilting or pantograph (which I realize is just one of the longarming options, but I'm totally with you - see The Great Stitch Length Debate post). A few of you even mentioned that your family members preferred your quilts to be completely self-made.

 The purpose of my wholecloth quilt experiment (final blog post forthcoming) was to write a phrase every day for 6 weeks... I never would have tried this if I didn't feel comfortable quilting on my domestic.

On Instagram, there was more of a varied response from those who don't quilt their own quilts. Many mentioned fear or anxiety about moving past straight lines and/or stippling. Other common responses were time constraints to finish projects (sending out quilts for longarming gives you more time to piece other quilts), space and/or energy restraints for larger quilts (I won't sugarcoat that process; it can be a bear), not enjoying the quilting process, and wanting that professional finish from a longarmer.

Oh, and finally, in both places, lots of you mentioned just loving quilting in general. I'm not saying you have to love it (you're totally welcome here either way!), but give it a chance... it might surprise you. :) And if not, that's okay, too. We all love different things about quilting. Now, who can I send my quilts that need binding??

Clearly, we all love this craft, and it's an emotional (and financial) investment either way. Thanks for giving me food for thought and for contributing to a valuable discussion!

Tuesday, January 3, 2017

Why I Quilt My Own Quilts

You're probably expecting me to wax poetic about the loveliness of completely making a quilt from start to finish, right?


Nope. There's one MAJOR reason I have never sent a quilt out in 6.5 years, and probably never will. Not even show quilts.

It's cheaper to quilt it myself, on my home machine!

 I typically free motion quilting, but sometimes I straight line quilt with my walking foot. Here's my work in progress this week - I've marked lines with my chalk pencils. And this quilt is based on a beer bottle... more soon!

When I first started making quilts, I was in the middle of earning my undergraduate degree in history and teaching. I had several loans out and more looming on the horizon. I worked a couple of part time jobs while I went to school full time. (which didn't really amount to much cash anyway). I was 20, and I discovered the WORLD OF QUILTING.

That magical world that you've probably discovered at some point! You know, you're going about your normal, non-quilty life and then all of a sudden, you get sucked in. You can't look away. KONA COTTON! THREAD! COLOR CARDS! ANNA MARIA HORNER! AH!

I just stumbled upon this photo from a guild retreat in 2013! I was quilting our nearly-queen sized Dresden Rainbow wedding quilt. Wow, time flies, and I look so different now!

So, when I was a brand new baby quilter, I did NOT have the money to buy most or all or hardly any of these things. As Google and lots of blogs taught me the quilting process (milennial here - we use the internet a lot), I balked at the longarm quilting prices.

EDIT: I actually should explain this part, too - I didn't really understand how exactly quilts got sent out for quilting until I joined a quilt guild several months later. So another reason I started quilting my own quilts is because it just seemed easier!

Now, I love long arm quilters - I have several friends and they do AMAZING work. It's often expensive to get a quilt longarmed, and rightly so! You are investing in someone's talent, machine, and business. I know lots of piecers want their quilts to have professional finishes. That's wonderful, but remember that's only one route to a finished quilt.

I personally love to save money where I can. There's no way I could financially indulge in the amount of quilts I make if I sent them away to be quilted.

 Metropolis being quilted. I just kind of went for it with long free motion curves in the border.

There are actually a lot of reasons I think people should quilt their own quilts, if they can invest the time and energy. These are reposted from one of my most popular posts in 6 years, Top 10 Tips: Quilting Large Quilts on your Home Machine:

Why should you quilt your own quilts?
1. You have complete control of the outcome. No ifs, ands, or buts about it.
2. You will finish a quilt from the very beginning to the bitter end. That is a huge accomplishment! [okay, I did mention this, but really, it's an awesome feeling]
3. With practice and the right tools, you can create beauty!
4. You can strengthen your arm muscles. :D [but really, no joke]
5. Creating a design on top of the design you've already pieced is so satisfying.
6. You aren't spending extra money on sending your quilt out [which also leaves extra for fabric, thread, and batting to make another quilt]

Keep in mind that you might have to invest in tools and thread to quilt your own quilt. At the very basic level, you just need a sewing machine and some thread. I quilted (free motion!!) on a tiiiiny Brother machine for 3 YEARS and didn't have too much trouble (and you can read about my upgrade process here). It's all possible. You just have to try, and practice. There's a lot of us doing it! You can, too! :)

Quilting on your home machine isn't always a pretty picture. My Epic AMH Medallion quilt is an oversized queen, and it took a lot to maneuver it around (and it's backed in flannel). But I did it, and I LOVE IT.

Oh, and by the way - since I've just started becoming interested in hand quilting, I'm actually considering quilting one quilt entirely by hand this year. Where this comes from, I don't know, but I'm excited. :P

So... a couple of questions for you.
1. Do you quilt your own quilts? If so, why? Do you send some out, or all of them?
2. Have you hand quilted an entire quilt? Do you have any advice for me? I'm pretty much a beginner when it comes to hand quilting! Should I use a hoop, for example?
LinkWithin

Related Posts Plugin for WordPress, Blogger...