Thursday, November 28, 2013

Mint Chocolate Chip: A Finished Quilt

Named because a) it's one of my mom's favorite ice cream flavors and it's for her, b) I was freezing most of the time I made it (this quilter doesn't take well to the cold), and c) because I've been craving ice cream lately, this is Mint Chocolate Chip.


Mom has already been spotted in her natural habitat with the quilt draped around her (multiple sightings reported by the sister who lives there, lol). That makes me SO happy! The best quilts are the ones that get used (PSA to people I give quilts to - please use them!)!!


As I explained earlier in the month, I was reinvigorated and inspired to finish this quilt out of the blue. It's been stashed out of sight in a bin for a year and a half, even before I got married. My mom chose the fabric (Impressions by Ty Pennington) and she started cutting out every. single. little. piece. of the pattern with me over several nights (the pattern is "Curlicue Crush" by Rebecca of Chasing Cottons). Overall, this quilt tested my patience and my resolve, but I came out victorious (me: 1, quilt: .5).


I rarely follow patterns at all. However, I remember seeing the original Innocent Crush version for the first time and shamelessly drooling a bit. I wanted those curves and I wanted them bad. I didn't use Rebecca's method of pinning and sewing curves; I used Leanne's pinless tutorial instead. Though it was a huge learning process, I am so happy with the way everything turned out! I know everything isn't perfect, but it doesn't matter, right? If you're interested in more of my thoughts on this topic, you can read my SWC "Perfection" post here (you have until Dec. 8 to link up your own, too!).


This quilt is not *totally* my *style* or my *colors* (not that it matters because it's for my mom). I knew I wanted to add in solids to allow the eyes to rest, and to have some negative space (as it turns out, it was there I could do some awesomely fun FMQ). Sarah thinks they look like ornaments. I have to agree now that I'm looking at it from far away! :)

The quilting was fun once I got started. I left 5 of the curlicues completely unquilted, which made them pop out a bit. In the rest, I traced a smaller curlicue in the middle (it was part of the pattern), and tried several different FMQ motifs around them. Mom requested that I quilt in her name on the very bottom. Your wish is my request, mom. It probably took about two minutes - compared to how many hours the piecing took, it was a pleasure!

 Also, this was the first time I tried Warm and Natural batting (I usually use Hobbs). I loved how thick it was, and how it seemed to help the quilt crinkle after washing :D I will definitely be using it again soon.


I wrote my "label," all quilty details, and a message for mom on the back, in the curlicue imprints. I still need to get a picture of my mom AND I with the quilt - I will post it here soon! Finally, I'm so glad to finally share (I had it finished for three days but I could not take pictures because of the constant rain!). Sis and I snapped a few right before Thanksgiving dinner. On that note - Happy Thanksgiving (or Thanksgivukkah if you are celebrating Hanukkah, too :) )!


Sunday, November 24, 2013

Sewing With Certainty #2: Perfection

Welcome to SWC #2! Last week, 7 lovely ladies linked up their thoughts on choosing fabrics. Each post was different and (in my opinion) refreshing to read. I highly suggest you check them out if you haven't already!


Topic 2 is dedicated to a somewhat heavy topic and often, the elephant in the room - perfection. To me, this topic is about the inherent expectations that come with sewing and with blogging. To you, it could mean something completely different, and I'd love to read your post about it (link up at the bottom of this post)! All link ups have a chance to win one of two fabric prizes from 1 Choice 4 Quilting and myself! You can also still link up your goals here.

http://www.1choice4quilting.com/

So, perfection... here it goes. As an (almost) 24-year-old quilter, I am always the youngest in a group of quilters, including my guild. While age is just a number, I have always felt a bit daunted by the experience and skill others bring to the table. I also view it as an opportunity to learn, but still - it can be daunting to hear some of my friends say they've been sewing for 20+ years (longer than I've been alive!).


 A tiny project I've been working on lately, which I am so proud of - my seams match up!

This year, my third full year of sewing and quilting, was revolutionary in many ways. I can make HSTs with no problem, and I've gotten to know my new machine (pretty well). When I do patchwork, the seams actually LINE UP! I've gotten much better at both sewing and pressing. I used to fret a lot over how bad my patchwork looked. I don't really know why I fret. Is it because of the sneaking pressure to be perfect?

*Freaking out* this block came out nearly "perfect."


As I've improved, I've developed a mental list of thoughts and suggestions to remind myself NOT to fret.

1. Angela Walters' lecture in June for the CJMQG. Angela encouraged us to make mistakes when we are quilting. Don't worry about pulling out that FMQ that isn't perfect. JUST KEEP GOING! It's all about attitude. Plus, I think the mistakes show that we are always learning. Right? You can read my recap of the lecture here if you are interested. Overall, Angela taught me to just "keep going," whether it's with quilting, sewing, or blogging.

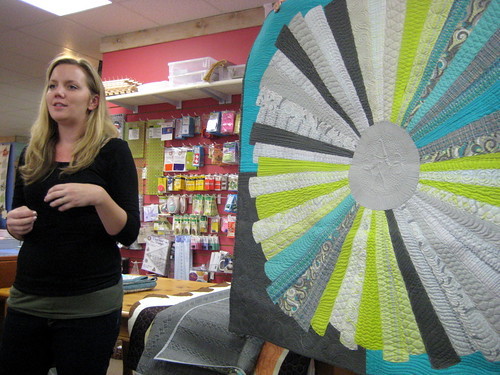
Angela Walters

2. I remind myself to make time for sewing every day. The more I sew, the better I get. Also, it's my stress relief, so even just a half hour to an hour on the busiest days is enough to calm me down. :)

3. In terms of blogging, there is an unsaid expectation to always be creating new, engaging content for your audience and prospective followers. However, I've learned that it's important for me only to blog for myself - yes, selfishly. I enjoy scrapbooking but this method works better to keep track of all my creations and thoughts. I created this series because it was something I felt strongly about, and that I knew I could talk about. I hoped others would feel the same. Even if they didn't, and only one other person besides myself found SWC inspiring or helpful, I would be happy. I refuse to let blogging become a chore by letting myself blog about what I want, when I want (which is why this post is so late on Sunday - I was sewing most of the day!).

4. Another blogging reminder for myself - to continue to worry about me and only me. There are so many amazing quilters and bloggers out there, but everyone is different, and even though I feel like I haven't found my "niche" in quilting, I'm still here, chugging along, and that's really all that matters! Plus, I just hit 410+ followers on Bloglovin and 310 on GFC, so that was exciting (thank you!!!).

Sneak peek at the quilting I'm doing this week... just because a post without photos just isn't the same ;)

5. Here's something I hinted about in point 1. As a teacher, I have seen how even students who have mastered topics are still always learning. There is always something else to learn. I think that's why quilting is so wonderful - there's always a new fabric to try, a new technique to practice, and new thing to create. I might waste fabric, I might use too much thread because my machine acted up (or maybe I acted up), I might have to redo a section of quilting because I didn't realize the backing folded over completely, but it doesn't matter - it's my creation, and I'm still learning. And so are you.

I'll end this post with one of my favorite sayings: just go make stuff! Whatever you want to, just make it. The skills and perfect points and straight seams and gorgeous tension FMQ will come with time. They might never completely manifest, and that's okay, too. Just dive in and try it. And don't worry so much about the small stuff. I'm still learning this every day, and I don't think there's such a thing as perfect sewing, quilting, or blogging. I'm kind of glad there isn't.


SWC Schedule:

  • Sunday, November 3: First Linky Party! Write a blog post about the crafty areas in which you want to gain more confidence, and/or discuss a project you will be working on during the series that will help you gain this confidence.
  • November 10: Choosing Fabrics
  • YOU ARE HERE ==>November 24: Perfection
  • December 8: Approaching New Patterns/Concepts
  • December 22: Free Motion Quilting (FMQ) with Christa of Christa Quilts
  • January 5: Creating Your Own Designs
  • January 19: Showcasing Your Work
  • February 2: Writing A Sewing Blog
  • February 9: Final Linkup! Write a blog post about a project you worked on during the series that helped you gain confidence in your skills.
  • February 16: Prizes awarded from all Linky Parties!

Saturday, November 23, 2013

Contributing to Sew Mama Sew's Handmade Holidays Today!


I've compiled a list of cute and simple (and mostly sewing-related) ornament tutorials as part of Sew Mama Sew's Handmade Holidays. This is a large scale event and I am so excited to be included! You can find my picks over there today - go check it out and comment there for a chance to win some fabulous prizes! Thanks to Sew Mama Sew for hosting a fabulous series every year!

I'm contributing!

http://www.sewmamasew.com/2013/11/november-23-ornaments/ 

Meanwhile, TODAY is (FINALLY) the 50th Anniversary episode of Doctor Who! My husband, his brother, and my sister are getting together to geek out and watch. And I'm trying to finish this guy for the geeky embroidery wall in our apartment. :)


Oh, and I saw Catching Fire on Thursday. I'm still feeling all the emotions. I think Hunger Games book fans know what I'm talking about! What did you think about the movie? I was so impressed with everything and I thought it was even better than the first!

Friday, November 22, 2013

T-shirt Quilt Finish


 More than a month ago I finished a custom t-shirt quilt for my father-in-law. He requested a double-sided quilt; one side to feature his Yankees, Giants, and Rangers gear, and another to show off the t-shirts he's gathered from reffing and playing on baseball teams.


I kept the quilting to a minimum because a lot of FMQ is tough to do on a heavy t-shirt quilt (ask me how I know this). Plus, I wanted it to stay "manly," relatively linear, and to show off the t-shirts. My favorite method for nice, straight lines on t-shirt quilts is painter's tape!


I used my friend Renee's awesome double-sided quilt hanging sleeve tutorial, and now the quilt proudly hangs in his bar/tv room! He says he switches it up all the time :) It makes me SO happy when someone really appreciates handmade!


After the holidays I plan on writing a tutorial for how I make t-shirt quilts. My process is different than that I've seen otherwise online, so I look forward to sharing!


Photoshoot with the husband at the park :)

Linking up: Crazy Mom Quilts

Thursday, November 21, 2013

Giveaway: Heirloom Fabric and a Voile Scarf

 *Giveaway closed! Luanne and Courtney have won and have been emailed!*

It's giveaway day over at the Quilting Gallery! I'm also belatedly celebrating my third blogaversary, which happened in September (in the midst of our crazy move!).

Blog Hop Party with Give-Aways

I've grown so much as a quilter (and just generally as a sewist) in the last three and a half years, which I'll discuss more in December. Here's a mosaic of many projects I finished within the last year (it's been pretty productive so far!):


1. Dresden Rainbow - Our Wedding Quilt, 2. "Sedona" - for Layers of Hope 911, 3. Sisters' Ten BOM - September block, 4. AMH Embroidery, 5. Pumpkin Spice Latte quilt back, 6. "Falling Up" mini quilt, 7. Tinkerbell lantern interacting with the larger ones :), 8. "Summer Fun" Baby Quilt, 9. Bloomin' Pillow - Quilt As You Go, 10. Facets of Emerald, 11. Snowflake Strip Quilt Top, 12. Argyled, 13. Modernista Homemade Spring 2013, 14. Triangle Sewing Machine Cover, AMH fabrics, 15. "Bon Chance" Mini Quilt, 16. AMH Laptop Sleeve


Thank YOU for supporting me and my quilting endeavors! <3


The first winner will win one half yard of the Heirloom by Joel Dewberry print on the left, and a fat eighth of the print on the right. These are brand new and unwashed - I haven't used an inch yet!


A second winner will win a handmade voile infinity scarf made from Anna Maria Horner's Innocent Crush. Voile is AMAZING to wear as a scarf (so buttery and soft!) and I know you will love it! I'm sad to give it up but I want to make it for someone who will appreciate it. I'll make yours just like I made my sister's :)


To enter, please leave one comment about the most beautiful place you've ever traveled.  I have a severe case of wanderlust, especially after visiting Germany, Prague, and the Czech Republic two years ago... so, indulge me, please! :) Followers get an extra entry - just comment again.

This giveaway will close at 7 pm on Nov. 26. I will draw a winner that night using Mr. Random. I will ship internationally. Don't forget to check out the other giveaway here!

Usually I respond to all comments, but please understand that I may not be able to do so due to the sheer amount of emails. Thank you! And don't forget to check out the other giveaways here!


Wednesday, November 20, 2013

Tutorial: Simple Patchwork Christmas Card

Today I'm reposting a fun tutorial I wrote for my friend Rebecca's Christmas in July series last year. I hope you enjoy! Please feel free to try making some patchwork cards as the holidays creep up on us - I'd love to receive a comment or email with a picture! :)
 This project can be streamlined and simplified in a thousand and one different ways: the quilted card. It takes about 15 minutes... maybe less (and you can do several at once!)
Materials:
  • 1 12" x 12" piece of cardstock (scrapbooking paper works great!)
  • 1 6" x 6" piece of cardstock (same color or different, depending on your taste (I chose white to go with green
  • Charm pack of Christmas fabrics (I used Kate Spain's Flurry)
  • Glue stick
  • Thread, pins, scissors, rotary cutter, sewing machine
*Quick note: the 6" x 6" card made from this tutorial will not fit into most envelopes; you may have to adjust your measurements and your cardstock cutting. It made more sense to give these measurements than the crazy ones that would accompany the many different kinds of possible envelopes you have. Of course, you don't have to do patchwork, either; you can make any design to fit your card size!
 
1. Cut your cardstock in half (at the 6 inch mark). Put one half aside, and fold the other in half. You should now have a folded card that is 6"x6" when folded, 6" x 12" unfolded. You can even make two cards with one piece of cardstock!
2. Choose five of the 5" squares from your charm pack to use for the patchwork. You can do 9 different squares if you want. Above are 3 of the 5 squares I chose.
3. Cut a 2 1/4 inch wide strip out of one charm square. Cut THAT strip twice into 2 lengths of 2 1/4. The pictures above shows the little piece of extra you will have after.
4. Repeat for all other charm squares. You will have more than 1/2 of the charm square left each time, so put it aside to make more patchwork cards later. Never let that go to waste! :)
5. Once you have 9 little 2 1/4 x 2 1/4 squares, decide on your layout and pin in three rows, across.
6. After this initial sewing, you'll have three rows. PRESS! This step is so important! Some people press their seams open (like above) but I suggest actually pressing them to the side, alternating for each row. When you do this, the seams nest together.
 
7. Pin the rows together. Repeat (sew, press). Now you have a little patchwork square!
8. Unfold your card and pin the patchwork to the front, centered. Don't worry about the pins making marks in the paper (or the sewing you are about to do); it will be covered up.
9. Quilt your patchwork as desired (right onto the card. Beforehand, you *may* want to use fusible interfacing to make the patchwork more sturdy, but I did not because I didn't know how much weight it would add to the card overall.
I decided to quilt along the seams, 1/4 of an inch away. I would recommend using a dull needle for this part if you have one on hand, and sew slowly!
10. Slowly zig-zag stitch your way around the patchwork to help with those raw edges. This is an important applique step.
11. Take the cut piece of 6" x 6" cardstock (either the color of your card, or another color), and use a glue stick to glue it over your quilting lines on the card's inside. It makes the card look crisp and clean. You could write a message on top of it, or even draw a picture!

12. Finally, write your message. You probably will want to personalize it when December approaches, or maybe you'd like to just get that done now ;) Just think - you could have a stack of Christmas cards waiting to be sent out!!


Overall, a very thoughtful, homey feel, don't you think? Perfect for Christmas.
This project is extremely versatile. They don't have to be Christmas cards; they can be Hanukkah, Kwanzaa, or Christmahanukwanzaakah cards. Season's greetings. You could even make cute gift tags this way (and you wouldn't have to worry about covering up the back!) Here's a picture of some notecard thank yous I made previously, using this method:
 

Sunday, November 17, 2013

It's DONE, but not quite... help!

Thank all that is mighty, this quilt top IS DONE. I put on a slew of my favorite Friends episodes yesterday and finished it up. Phew. It took up ALL of my sewing time this week, and that was actually a decent chunk of time!


Now I need your help.  My mom, who is the recipient of this quilt, is indifferent to how it will be quilted. I want to do something fun for me (yes, I'm being selfish), since piecing all of those little pieces became tedious. Plus, since it's a bed/comfy lap quilt, I don't want to quilt it TOO densely.  I was thinking something angular, to contrast all the curves, but I just don't know what... any advice? The pattern suggest tracing each curlicue with a smaller one on the inside, but I don't have the heart to go marking up my whole quilt. Maybe, some curlicues and some with different FMQ? Or just straight lines? What do you think? 

Linking up to Fabric Tuesday, WIP Wednesday.

Thursday, November 14, 2013

Small Project Thursday

 *SWC #1 - Choosing Fabrics - Linkup is here!*

I've found small projects very fulfilling lately (anyone for a weekly or biweekly linky party? Let me know in the comments if you're interested :) ).


My sister's seventeenth birthday was today, and I made her a voile scarf with Wrenly by Valorie Wells (she loves it!!). I've been holding onto the voile for a few months now because I knew she liked the pattern and that she would love an infinity scarf. I used this easy-to-follow tutorial from Sew4Home, and it was suuuuuper easy. I was definitely sweating when I cut the voile though... I'll miss it in my stash (can we say, fabricholics anonymous?).

(She approves of this photo for blogging purposes! I asked!)

A couple of months ago, I got some beautiful home dec yardage from Terry's Fabrics. Since I just became an SAT tutor (yay!), I now have to lug this behemoth back and forth from the tutoring center. I also wanted it to be fashionably covered when I throw it in my car and when I take it out in the soon-to-be snowy weather (though I'm in denial about that).


So, I made an easy tote bag from Skip To My Lou's tutorial.You know I couldn't help but use some of the Volumes fabrics from Anna Maria Horner for the inside... I know, I cut into the precious stuff!


 I'm really glad I chose this pretty leaf fabric for the outside - I love seeing it every day. :) Thanks so much to Terry's Fabrics! I plan to use the rest for some new, big fabric grocery bags (anyone have a tutorial they love?). Look out for that post to come.


Anyway, in terms of big projects, I'm still piecing the curve quilt. Asdfghjkl;. You can actually see it in pieces in the first picture of this post. I want to say I'm still enjoying it but I really am just anxious to start quilting!

What small projects are you working on right now? 


LinkWithin

Related Posts Plugin for WordPress, Blogger...